
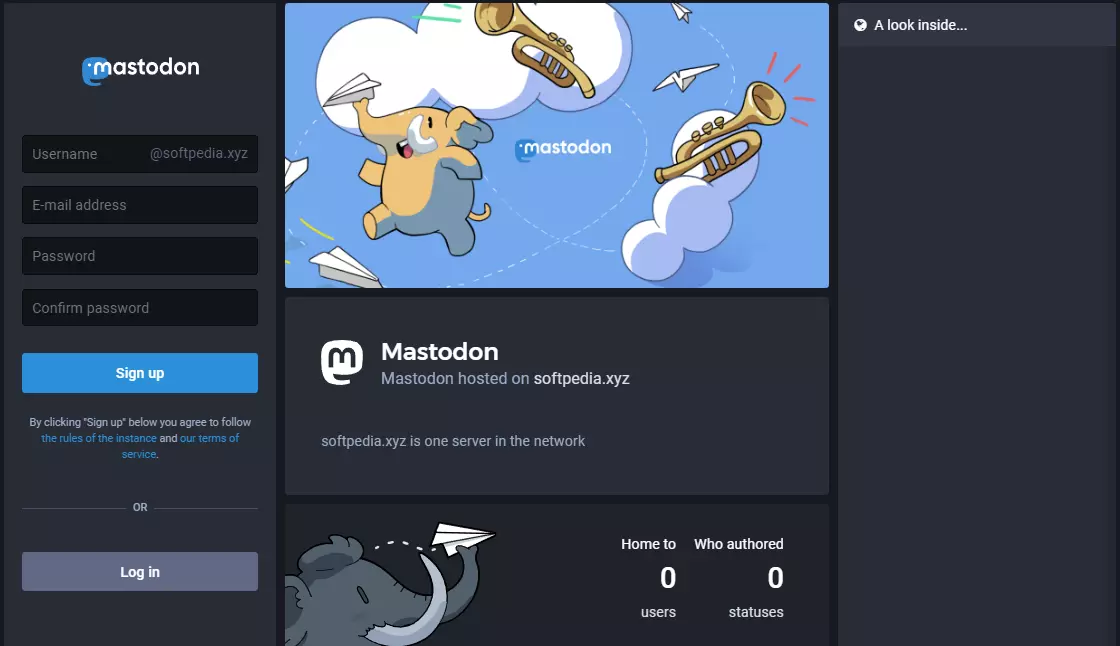
A free, open-source, decentralized social media platform is Mastodon. It was developed as a substitute for Twitter. People can follow one other and publish messages, photographs, and videos, just as on Twitter. However, unlike Twitter, there is no single repository or content authority. If you are looking for how to install Mastodon using Docker, this article is dedicated to you.
Mastodon runs on hundreds of distinct servers, each of which is manned by a different community member. Users who have created accounts on different servers can easily connect and follow each other between instances. A Mastodon server instance can be set up by anyone. This guide will show you how to install Mastodon using Docker on a server running Ubuntu 18.04.
How to install Mastodon using Docker? This article includes the perquisite required to install Mastodon using Docker installing dependencies, configuring firewall and complete process to install Docker. Go through the article and explore the details.
How To Install Mastodon Using Docker?
Let’s go through the details and follow the steps below to install Mastodon using Docker:
Step 1. Prerequisites
Step 1: A server running Ubuntu 18.04 with a sudo user who is not root.
Step 2: Make sure your system is current.
$ sudo apt update$ sudo apt upgradeStep 3: Users of Mastodon receive email notifications. Setting up your own mail server is one way to make it work. On the same server where you will be installing Mastodon, or on a different server, is your choice. The scope of this guide does not include doing it.
Step 4: Use a third-party transactional mail solution, such as Mailgun, Sendgrid, Amazon SES, or Sparkpost, is what we’ll advise. When following the directions in the manual, Mailgun will be your SMTP provider.
Step 5: Ensure that your domain points at the server. We will use example.com as the domain for this tutorial.
Step 2. Installing Dependencies
Installing dependencies is the next step to install Mastodon using Docker:
Step 1: Before installing Mastodon, we must ensure that our server is equipped with the necessary programs. Install the dependencies by issuing the following commands.
$ sudo apt update$ sudo apt install ca-certificates curl ufw apt-transport-https software-properties-common git -yStep 2: You could already have some of the aforementioned apps installed. We should configure Git because we installed it before moving on.
$ git config --global user.name "Your Name" $ git config --global user.email "[email protected]"
Step 3. Configuring Firewall
Configuring Firewall is the next step to Install Mastodon Using Docker:
In the step before this one, we installed ufw (Uncomplicated Firewall). Mastodon needs to be configured before we can move on to installing it.
Step 1: To prevent lockout, enable SSH and the port we just configured.
$ sudo ufw allow OpenSSHStep 2: Enable the ufw firewall.
$ sudo ufw enableStep 3: For Mastodon to function, http and https must also be enabled.
$ sudo ufw allow http$ sudo ufw allow httpsStep 4: Check the firewall status.
$ sudo ufw statusStep 5: The output should look something like this.
Status: activeTo Action From— —— —-
OpenSSH ALLOW Anywhere 80/tcp ALLOW Anywhere 443/tcp ALLOW Anywhere OpenSSH (v6) ALLOW Anywhere (v6) 80/tcp (v6) ALLOW Anywhere (v6) 443/tcp (v6) ALLOW Anywhere (v6)
Step 4. Install Docker
Install docker is the next step to Install Mastodon Using Docker
Step 1: Add the GPG key for Docker to your machine.
$ curl -fsSL https://download.docker.com/linux/ubuntu/gpg | sudo apt-key add -Step 2: Check the key’s fingerprint after downloading it.
$ sudo apt-key fingerprint 0EBFCD88Step 3: You will find an output like the following.
pub rsa4096 2017-02-22 [SCEA]9DC8 5822 9FC7 DD38 854A E2D8 8D81 803C 0EBF CD88
uid [ unknown] Docker Release (CE deb) <[email protected]>sub rsa4096 2017-02-22 [S]Step 4: Add the Docker repository.
$ sudo add-apt-repository "deb [arch=amd64] https://download.docker.com/linux/ubuntu $(lsb_release -cs) stable"Step 5: Update your package database.
$ sudo apt updateStep 6: Install Docker-CE. CE is the Community Edition of the Docker.
$ sudo apt install docker-ce -yStep 7: Docker ought to now be set up. Verify that it is operating.
$ sudo systemctl status dockerStep 8: The result should resemble the one below.
? docker.service - Docker Application Container Engine Loaded: loaded (/lib/systemd/system/docker.service; enabled; vendor preset: enabled) Active: active (running) since Tue 2019-10-22 18:26:29 UTC; 25min ago Docs: https://docs.docker.com Main PID: 3574 (dockerd) Tasks: 8 CGroup: /system.slice/docker.service ??3574 /usr/bin/dockerd -H fd:// --containerd=/run/containerd/containerd.sockStep 9: To exit, press q.
Step 10: To run Docker without sudo, add your restricted Linux user account to the Docker group.
sudo usermod -aG docker $USER
Step 11: The current logged-in user will be selected by the $USER variable and added to the docker group. If you are not logged in as that user right now, substitute $USER with the actual username.
Step 12: Change to the new user that we added. You will still have to switch to it once more to reload the privileges even though you are already logged in.
$ su - ${USER}Step 13: Run the integrated “Hello World” program to ensure that everything is functioning properly.
$ docker run hello-worldStep 14: The results listed below should show that Docker is installed and operating correctly.
Unable to find image 'hello-world:latest' locallylatest: Pulling from library/hello-world1b930d010525: Pull complete Digest: sha256:c3b4ada4687bbaa170745b3e4dd8ac3f194ca95b2d0518b417fb47e5879d9b5fStatus: Downloaded newer image for hello-world:latestHello from Docker!This message shows that your installation appears to be working correctly.
Step 5. Install Docker Compose
Step 1: Although installing Docker Compose makes running Mastodon much simpler, especially if you want to run it on multiple servers, it is feasible to skip this step and continue.
$ sudo curl -L "https://github.com/docker/compose/releases/download/1.24.1/docker-compose-$(uname -s)-$(uname -m)" -o /usr/local/bin/docker-composeStep 2: The most recent stable version of Docker Compose is 1.24.1 as of the time this guide was being written. Their Github page has the most recent release version available for download.
Step 3: Put the docker compose binary’s permissions to execute under executable.
$ sudo chmod +x /usr/local/bin/docker-composeStep 4: Add Command Completion to Docker Compose.
$ sudo curl -L https://raw.githubusercontent.com/docker/compose/1.24.1/contrib/completion/bash/docker-compose -o /etc/bash_completion.d/docker-composeStep 5: Verify if your installation was successful.
$ docker-compose --versionStep 6: It will print out the following output.
docker-compose version 1.24.1, build 4667896b
Step 6. Install Mastodon
Step 1: You should Clone Mastodon’s repository to your server.
$ git clone https://github.com/tootsuite/mastodonStep 2: Navigate to the directory that just copied files.
$ cd mastodonStep 3: A sample setup file for Mastodon is included. To enable Mastodon, we must rename it.
$ cp .env.production.sample .env.productionStep 4: To create secret keys for our configuration file, click here. But first, we must create the Docker image.
$ docker-compose buildStep 5: After the image has been successfully generated, you must create a number of keys in order to set up Mastodon.
First, create SECRET KEY BASE.
$ SECRET_KEY_BASE=$(docker-compose run --rm web bundle exec rake secret)Step 6: Insert the above key in the configuration file.
$ sed -i -e "s/SECRET_KEY_BASE=/&${SECRET_KEY_BASE}/" .env.productionStep 7: Generate and insert the OTP_SECRET into the configuration file.
$ OTP_SECRET=$(docker-compose run --rm web bundle exec rake secret)$ sed -i -e "s/OTP_SECRET=/&${OTP_SECRET}/" .env.productionStep 8: Generate and insert the PAPERCLIP_SECRET into the configuration file.
$ PAPERCLIP_SECRET=$(docker-compose run --rm web bundle exec rake secret)$ sed -i -e "s/PAPERCLIP_SECRET=/&${PAPERCLIP_SECRET}/" .env.productionStep 9: Generate values for VAPID_PRIVATE_KEY and VAPID_PUBLIC_KEY.
$ docker-compose run --rm web bundle exec rake mastodon:webpush:generate_vapid_keyStep 10: Open the .env.production file.
$ sudo nano ./.env.productionStep 11: Search for VAPID_PRIVATE_KEY and VAPID_PUBLIC_KEY in the file and copy the output from the previous command.
Step 12: Discover the LOCAL DOMAIN variable, and replace example.com with the domain name you’ve selected for your Mastodon installation.
Put in the information you received from your SMTP provider.
SMTP_SERVER = smtp.mailgun.orgSMTP_PORT = 587SMTP_LOGIN = usernameSMTP_PASSWORD = passwordSMTP_FROM_ADDRESS = [email protected]Step 13: When done, hit Ctrl + X to save the document.
To apply all the changes made above, you must rebuild the Docker image.
$ docker-compose buildStep 14: Set up the database.
$ docker-compose run --rm web rails db:migrateStep 15: Pre-compile Mastodon’s assets.
$ docker-compose run --rm web rails assets:precompileStep 16: Run the following command to execute the container.
$ docker-compose up -dStep 7. Install and Configure Nginx Server
Step 1: You will need to install the Nginx server in order to configure it for Mastodon and install the SSL certificate. To install the nginx server, use the following command.
# sudo apt-get install nginxStep 2: By running the command below, you can remove the default site Nginx configuration.
# sudo rm /etc/nginx/sites-available/defaultStep 3: Remove symlink for default site by using command below.
# sudo rm /etc/nginx/sites-enabled/defaultStep 4: Create the Nginx configuration file for Mastodon by executing command below.
# sudo touch /etc/nginx/sites-available/mastodonStep 5: Create symlink of Mastodon by using command below.
# sudo ln -s /etc/nginx/sites-available/mastodon /etc/nginx/sites-enabled/mastodonStep 6: To open the Mastodon Nginx configuration file in a nano text editor, run the following command.
# sudo nano /etc/nginx/sites-available/mastodonStep 7: Copy-paste the following text in opened file and save the changes.
map $http_upgrade $connection_upgrade { default upgrade; '' close;}server { listen 80; listen [::]:80; server_name softpedia.xyz; root /home/mastodon/live/public; # Useful for Encrypt location /.well-known/acme-challenge/ { allow all; } location / { return 301 https://$host$request_uri; }}server { listen 443 ssl http2; listen [::]:443 ssl http2; server_name softpedia.xyz; ssl_protocols TLSv1.2; ssl_ciphers HIGH:!MEDIUM:!LOW:!aNULL:!NULL:!SHA; ssl_prefer_server_ciphers on; ssl_session_cache shared:SSL:10m; ssl_certificate /etc/letsencrypt/live/softpedia.xyz/fullchain.pem; ssl_certificate_key /etc/letsencrypt/live/softpedia.xyz/privkey.pem; keepalive_timeout 70; sendfile on; client_max_body_size 80m; root /home/mastodon/live/public; gzip on; gzip_disable "msie6"; gzip_vary on; gzip_proxied any; gzip_comp_level 6; gzip_buffers 16 8k; gzip_http_version 1.1; gzip_types text/plain text/css application/json application/javascript text/xml application/xml application/xml+rss text/javascript; add_header Strict-Transport-Security "max-age=31536000"; location / { try_files $uri @proxy; } location ~ ^/(emoji|packs|system/accounts/avatars|system/media_attachments/files) { add_header Cache-Control "public, max-age=31536000, immutable"; try_files $uri @proxy; } location /sw.js { add_header Cache-Control "public, max-age=0"; try_files $uri @proxy; } location @proxy { proxy_set_header Host $host; proxy_set_header X-Real-IP $remote_addr; proxy_set_header X-Forwarded-For $proxy_add_x_forwarded_for; proxy_set_header X-Forwarded-Proto https;
proxy_set_header Proxy ""; proxy_pass_header Server; proxy_pass http://127.0.0.1:3000; proxy_buffering off; proxy_redirect off; proxy_http_version 1.1; proxy_set_header Upgrade $http_upgrade; proxy_set_header Connection $connection_upgrade; tcp_nodelay on; } location /api/v1/streaming { proxy_set_header Host $host; proxy_set_header X-Real-IP $remote_addr; proxy_set_header X-Forwarded-For $proxy_add_x_forwarded_for; proxy_set_header X-Forwarded-Proto https; proxy_set_header Proxy ""; proxy_pass http://127.0.0.1:4000; proxy_buffering off; proxy_redirect off; proxy_http_version 1.1; proxy_set_header Upgrade $http_upgrade; proxy_set_header Connection $connection_upgrade; tcp_nodelay on; } error_page 500 501 502 503 504 /500.html;}Step 8. Install SSL Certificate:
Utilizing Certbot and Let’s Encrypt, we will install an SSL certificate. Execute the subsequent actions to achieve this.
Step 1: Update the package.
# sudo apt-get updateStep 2: Install software-properties-common.
# sudo apt-get install software-properties-commonStep 3: Add the certbot repository by using command below.
# sudo add-apt-repository ppa:certbot/certbotStep 4: Update the package to load the added certbot repository.
# sudo apt-get updateStep 5: Before an SSL certificate is issued, stop Apache.
# sudo systemctl stop apache2Step 6: Install python-certbot-apache using the command below.
# sudo apt-get install python-certbot-apacheStep 7: Execute the following command to get Let’s Encrypt SSL issued.
# sudo certbot --apache -d softpedia.xyzTo change the virtual host settings for SSL and redirect the link to https, choose option 2. relaunch the apache server.
# sudo systemctl start apache2You can access your website at https://your_domain_name.tld
Wrapping Up
Hope, this blog helped you to install Mastodon using Docker. Let’s go through the article as many times as required to install Mastodon using Docker on your server. If you are facing any issues or you are stuck, let us know in the comment box for help! Follow Deasilex for more updates on Mastodon!
Frequently Asked Questions
Q1. What Is Mastodon API?
With no advertisements and a decentralized architecture, the Mastodon API returns social networking data similar to that of Twitter. In order to access accounts, personalized emojis, follow inquiries and suggestions, media uploads, notifications, reports, statuses, and timeframes, developers can create call backs.
Q2. Can I Install Anything In Docker Container?
The packages must be defined in the Dockerfile in order to be installed in a Docker container. Use the RUN statement followed by the precise download instruction if you want to deploy packages in the container. You may always build again to create a fresh image by updating the Dockerfile with the most recent list of packages.
Q3. Can You Switch Servers In Mastodon?
Connor Couts On Mastodon, moderation functions a little bit differently. In response to your inquiry, I would say that certainly, that person could go and register for another server. You can also choose to block entire websites, though.
Q4. What Protocol Does Mastodon Use?
Mastodon implements federation using an open, standardized protocol. It’s known as ActivityPub. Any application that uses ActivityPub for federation can easily communicate with Mastodon in the same way that Mastodon webpages can.
Q5. Is Mastodon like Twitter?
Similar to Twitter, Mastodon enables users to post, follow individuals and groups, as well as like and repost other people’s content. Mastodon is not a single platform, despite supporting many of the same social networking functions as Twitter. Instead, it’s a network of connected, independently run servers.