
Instagram reels are much more hyped and the best leisure for most people. However, have you ever tried making a reel? If yes, then you would want to know how to reorder clips in Reels? We are here to tell you exactly how to reorder clips in reels you can do that.
Instagram Reels are the best pass time for anyone and everyone. You lose track of time, once your finger starts scrolling. Nonetheless, making an Instagram Reel yourself is no less than a great pass time. However, a lot of people get confused while actually making a Reel. Well, to admit making a reel can be a little complex sometimes. We are anyway here to solve all your queries that you are facing while making a reel.
It can be tricky to create an Instagram reel from existing footage. From time to time, you place a video in the incorrect location. Isn’t it capable of causing havoc? Don’t worry, we are here with a solution. This tutorial will show you how to reorder clips in reels in a straightforward manner.
How To Reorder Clips In Reels?
Are you wondering whether is it possible that you can reorder or rearrange your reels according to your preference? Well, then we are here with good news, you surely can reorder clips in reels simply by Open Instagram> Swipe Right> Select Reels> On the right select and add videos or photos from your camera roll> Select Preview Button> Select Edit Clips> Click Reorder> Press the clip and drag it> Hit Done> Press Play Button
Below is a detailed explanation of how to reorder clips in reels. Keep following the guide if you want to learn:
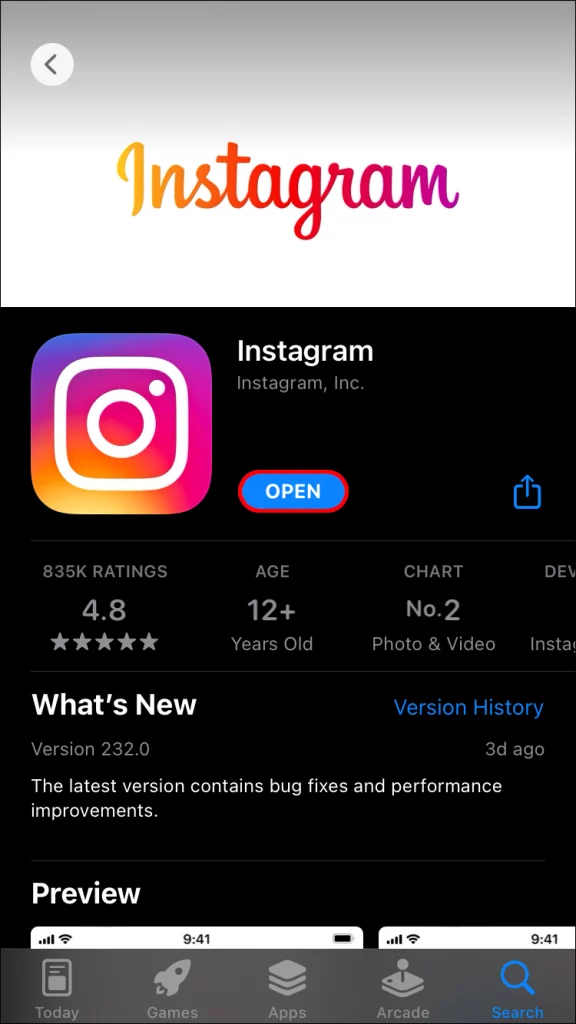
Step 1 Launch the Instagram App on your phone
Step 2 Once you opened the App on your phone, Swipe Right from your Instagram Feed.

Step 3: At the bottom, you will see multiple options, like Post, Story, Reel, and Live. Select Reel.

Step 4 Once you have selected Reel, at the left bottom corner you will see a sign + which for, to add photos and videos from the camera roll, Select +.
Step 5 Select whichever photos you wish to add.
Step 6 Once you have selected and added the videos click on Next or Preview on the bottom right side.
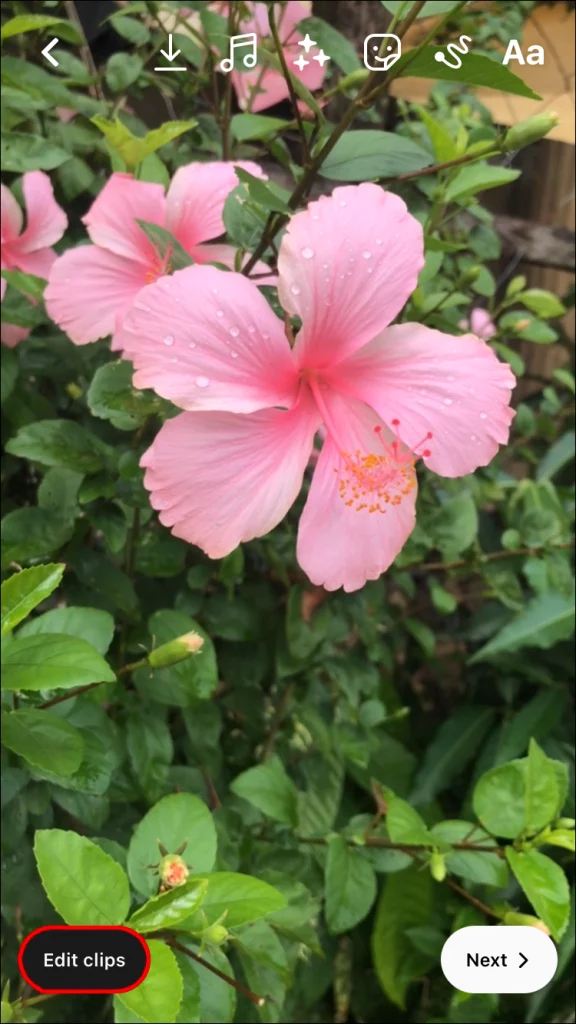
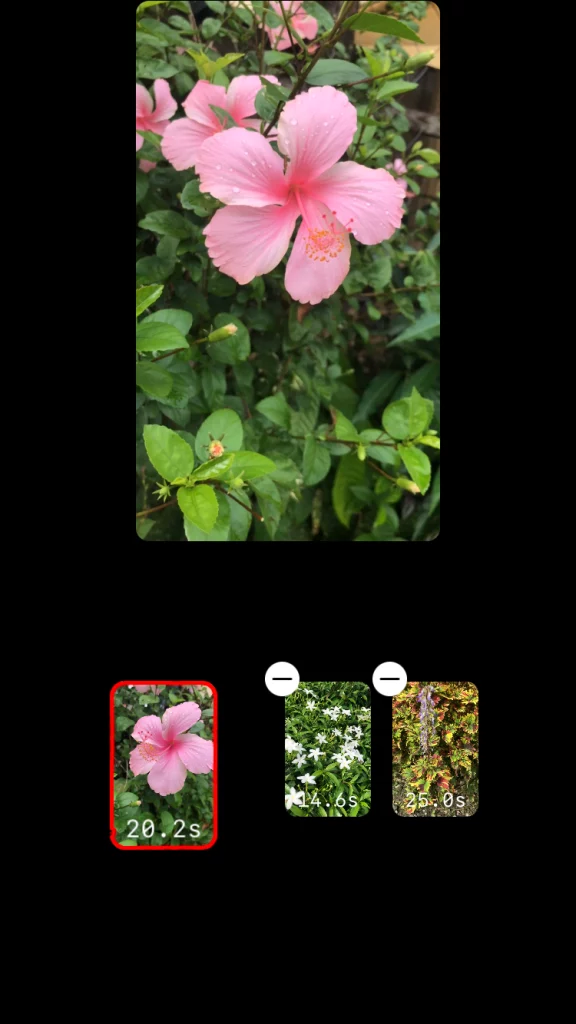
Step 7 There you will have your video/reel played. At the bottom left corner, you will see the option of Edit Clips, Select that.
Step 8 Click on reorder located on the bottom right.
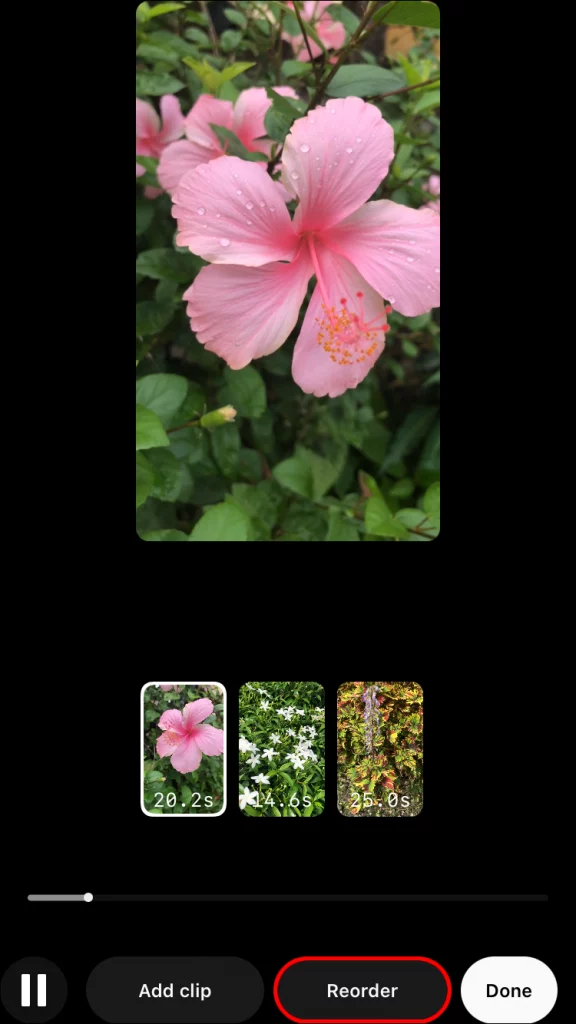
Step 9 Drag and Rearrange the clips according to your desired preferences.
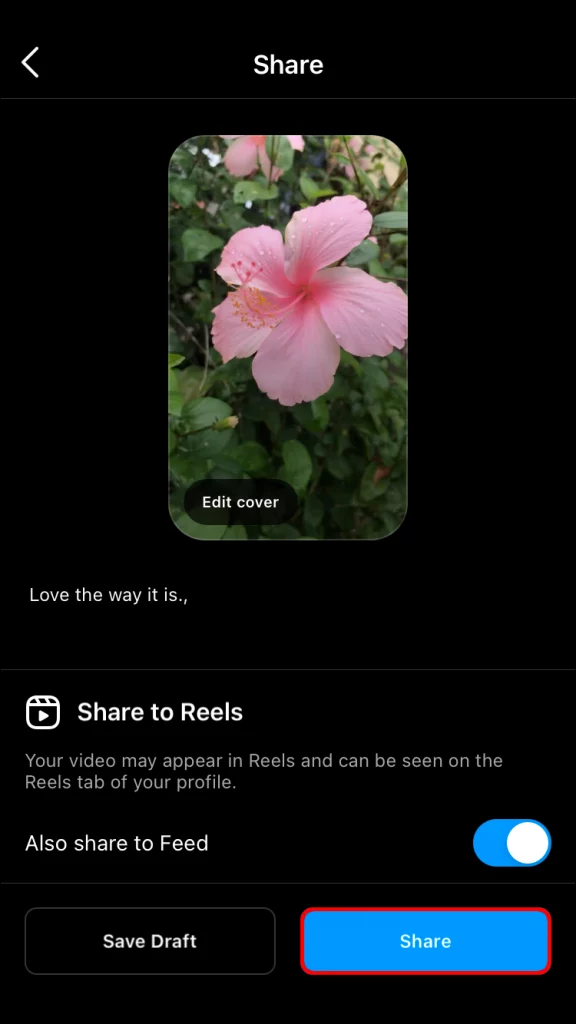
Step 10 Select Done and click on Next to view your Reel.
Step 11 Hit the share button once you are Reel is ready to be posted.
How To Add Clips In Reels?
Adding photos and videos to make a reel on Instagram is the easiest thing ever. However, if you don’t know how then we are here to tell you How to Add Clips In Reels step-wise. Open Instagram> Swipe Right from your Instagram Feed> Select Reel> Select + option in the bottom left corner.
Step 1 Launch the Instagram App on your phone
Step 2 Once you opened the App on your phone, Swipe Right from your Instagram Feed.
Step 3: At the bottom, you will see multiple options, like Post, Story, Reel, and Live. Select Reel.
Step 4 Once you have selected Reel, at the left bottom corner you will see a sign + which for, to add photos and videos from the camera roll, Select +.
Step 5 Select whichever photos you wish to add.
How To Delete Clips In Reels?
Are you into making reels? However, don’t know how to delete clips in reel? We are here t guide you on that. It is as simple as deleting a photo from your camera roll. Open Instagram> Swipe Right> Select Reels> On the right select and add videos or photos from your camera roll> Select Preview Button> Select Edit Clips> Select the Clip you wish to delete> Click on Delete.
Step 1 Launch the Instagram App on your phone
Step 2 Once you opened the App on your phone, Swipe Right from your Instagram Feed.
Step 3 There, at the bottom you will see multiple options, like Post, Story, Reel, and Live. Select Reel.
Step 4 Once you have selected Reel, at the left bottom corner you will see a sign + which for, to add photos and videos from the camera roll, Select +.
Step 5 Select whichever photos you wish to add.
Step 6 Once you have selected and added the videos click on Next or Preview on the bottom right side
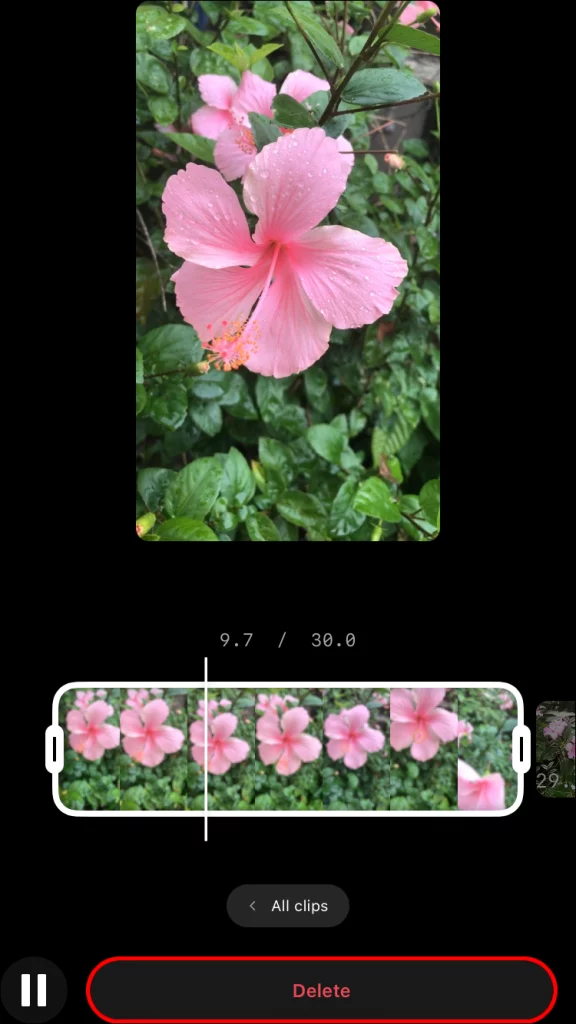
Step 7 There you will have your video/reel played. At the bottom left corner, you will see the option of Edit Clips, Select that.
Step 8 Select the video you wish to Delete and Click Delete.
How To Trim Clips In Reels?
Has this occurred to you about how to trim clips in reels? If yes, and you don’t know how to do it. Then we are here to tell you how you can possibly do that. Add Videos or Photos from your Camera Roll> Click Next> Tap on Edit Clips> Select the clip you want to Trim> Use the slider to Trim> Go to All Clips> Repeat The same for all the clips you wish to trim.
Below is a detailed explanation of how to trim clips in reels. Keep following the guide if you want to learn:
Step 1 Record your clips or choose to Add videos or photos from your camera roll.
Step 2 Click “Preview” or “Next” on the bottom-right corner.
Step 3 Tap the “Edit Clips” button.
Step 4 Press the clip you would like to edit, expand or trim.
Step 5 Use the slider to trim the beginning of the end of the clip
Step 6 Once you’ve eliminated the unnecessary parts, tap “All clips.”
Step 7 Repeat steps 4–6 times for all clips you would like to trim.
Wrapping Up
This was a complete step-wise guide on How to reorder clips in reels on your Instagram. Now that you know, you can now easily make as many reels as you wish to, hassle-free. We hope this article was helpful to you. And catered to everything you were looking for. If you have any related queries or doubts, feel free to drop your queries in the comment section below. We assure to revert as soon as we can.