

Communities are an integral part of Discord. Discord is making it a fundamental obligation to support communities and provide top-quality experiences for administrators as well as members. In this post, you will get to know about the most essential Discord Community Requirements for setting up a server for your up growing business needs!
If you are a leader of an organization, you can choose to designate your server as a “Community Server” inside Server Settings. You will also have access to powerful tools that will help you manage, moderate and expand your server. Sounds great!!
Well, to enjoy these Discord server privileges, you need to meet some Discord community requirements to enable the features. What are these requirements? How can you grow your Discord community simply by meeting up these Discord server requirements?
Here is a step-by-step guide for you to learn different terminologies for setting up a Discord server, to enable Discord server by fulfilling these simple Discord community requirements, and much more. After all, getting verified on Discord is a huge win-win for your business growth! So, check out these ways!
Discord Community Requirements
To enable Community on your Discord server it is necessary to be able to enable the following settings to ensure security within the community:
1. Safety Checks – Verification Level Setting
The members of the server need to be verified with an email in their Discord account prior to sending messages or directly messaging any person on the server. (Note that this does not apply to those who have been given roles!)
2. Explicit Media Content Filter
Media content filter scans media content from every member. This will scan all media uploaded to the server and remove all content with explicit content. You can however label specific channels NSFW to prevent this from occurring.
3. Rules Or Guidelines Channel
There should be a clearly displayed rules channel on the server for members. This will help new members to know what is cool and what’s not cool within your community!
4. Community Updates/Moderators Channel
The channel on which Discord will announce any sort of announcement and information relevant to the Community server administrators. Moderators are another Discord community requirement!
In addition, you must acknowledge that your server is compliant in accordance with the Community Guidelines as well as that Discord will be able to check the contents of your server in order to make sure that it’s secure! So, make sure that the users who join your server have a positive experience and do not violate the guidelines on your server.
How To Enable Your Discord Community Server?
If you’re interested in converting your server to a community server, then here are the steps that’ll let you enable discord community server.
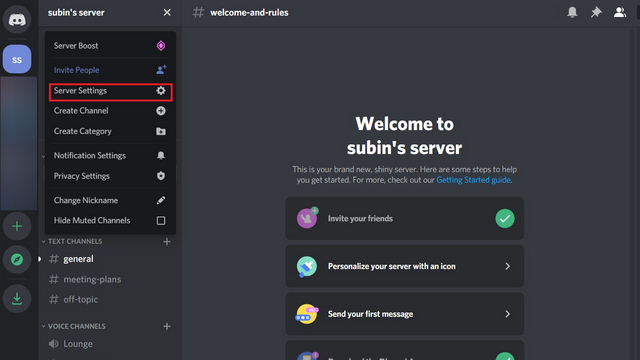
- Begin by opening the Server Settings.
- Click on the name of your server on the left-hand side of your screen. A drop-down menu will pop up!
- Press Server Settings within the menu.
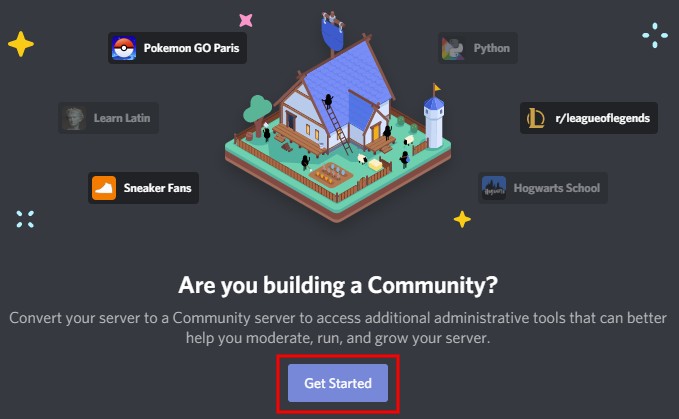
- Once you’re in the Server settings, you can scroll down then click Enable Community in the left sidebar.
- Click the purple Get Started button to start creating the Community Server.
- Then, you’ll go through an array of steps to ensure your community is prepared to be successful in its ability to manage and protect your community!
- Once you’ve confirmed that you agree and accept the Community Guidelines (in addition to the fact that Discord will be able to check the content of your server to be sure it’s secure and isn’t in violation of these guidelines), click Finish Setup to start managing your Community Server!
Features Offered By Discord Community Server
While you must be planning to use the updated Discord server for business or other engagement purposes. It’s better to understand pre-hand what all tools you’ll be getting access to while creating and using the Discord community server.
1. Welcome Screen
You can create a custom welcome screen for any new visitors to your server so that they are aware of what the community is all about and where they can begin. So, they can immediately go to the rules and welcome channels, instead of getting confused.
2. Announcement Channels
These channels allow users to send messages to people outside of your server. Users are able to “Follow” your announcement channels and receive updates directly on their own servers.
3. Direct Community Updates Via Discord
Changes and new features made by Discord could have a significant impact on your server. To keep your server up-to-date, it is now possible to select the moderator-only channel, only for official Discord updates. We’ll notify you of the alert so that you and your team of moderators are always prepared.
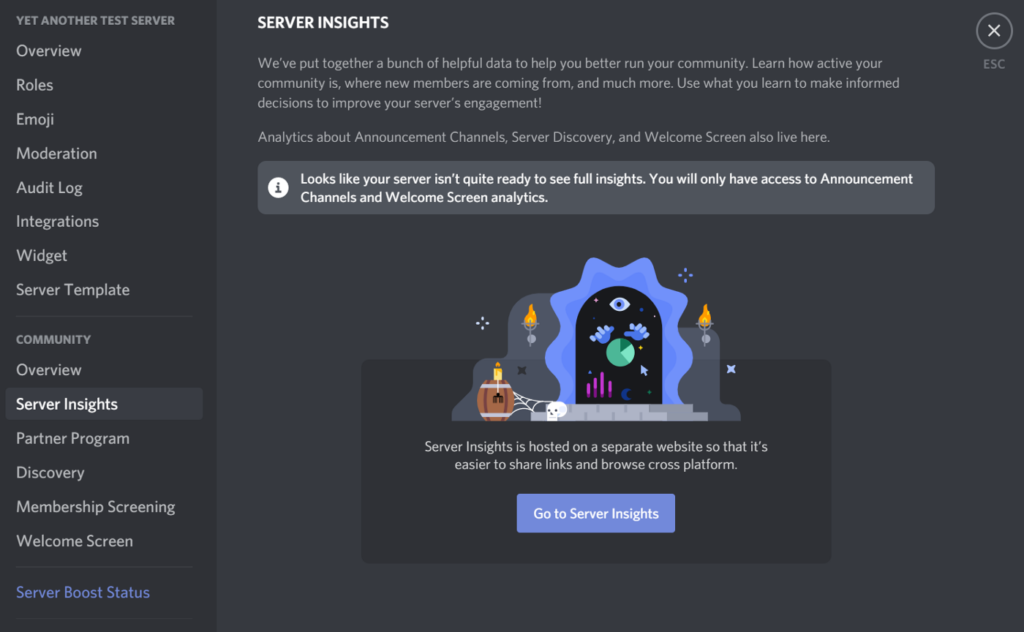
4. Server Insights
Server Insights offers information on your server, which can let the server administrator know what your server is performing. Are you satisfied? Are people talking? What is your retention rate? And all other additional insights like these.
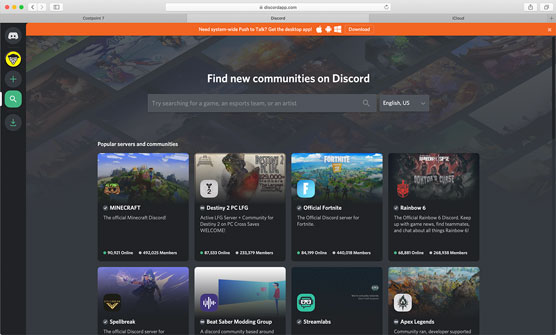
5. Discovery
You can showcase your community directly through Discord’s Server Discovery. There’s no need to promote your community anywhere and elsewhere to attract new members!
Note: Currently, this is restricted to servers with more than 1,000 members, and Servers that are Partnered and Verified. We’ll lower the limits as time goes by.
How To Customise Your Discord Community Settings?
In the event that you’d like to implement any changes on your server settings at any time, you can go back into the Server Settings, and choose the Overview tab (under the header of Community) on the left sidebar!
When you’re on the Overview tab there’s a way to:
- Configure your server’s Welcome Screen.
- Choose which channel will serve as your host to follow your rules and guidelines.
- Select the channel that will be the moderator’s primary channel to get updates from Discord.
- Change the Primary Language of your server.
How To Disable Your Community Server?
If at any point, you decide not to continue with the Discord community server anymore, you can immediately remove these settings, too! (And in the event that you decide to change your mind after removing it, you’ll have the option of enabling your Community server back!)
To turn off to disable the Community Server follow these steps:
- Go to your Server Settings and choose the Overview tab (under the Community header) on the left-hand sidebar.
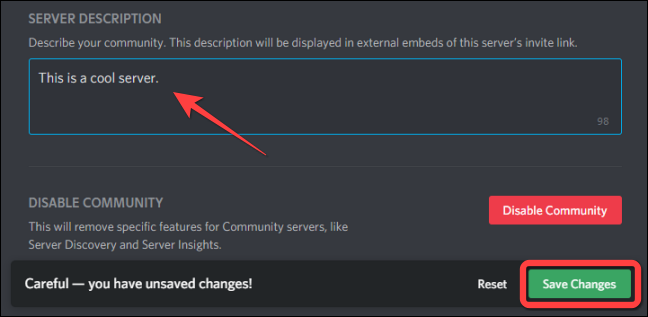
- When you’re in the Overview tab Scroll down until you can see the Disable Community section, and then click Disable Community.
- Make sure you click Save Changes to confirm that you wish to deactivate these settings.
Final Thoughts:
Community Servers is a great server with a variety of notable options, but most of it is targeted towards large servers or could be done through a Discord bot (which doesn’t have an obligation to join).
The main attributes that are worth switching on are membership screening, an announcement channel as well as a Stage channel.
So, these were all the Discord community requirements that you’ll be needing to build a strong Discord community. If you found these steps helpful, do share the post with your friends as well.
Got more queries? Reach out to us in the comments section below and get the best solutions right away.
Happy Learning!
Frequently Asked Questions Regarding Discord Community Requirements:
Setting up a Discord community is indeed easy. But getting verified on Discord and running a successful community may require some work on your part. Here are the most frequently faced queries by the users while setting up a Discord Community.
Q. Who Should Use Community Servers?
Servers with large numbers that aim to switch on Server Discovery or aim for the Partner Program should use community servers.
Q. What Are The Requirements For A Partnered Discord Server?
- The server must be eight weeks old to meet the set requirements.
- You must have more than 500 regular visitors on your server.
- A minimum of 50 communicators take part in active communication on your server on a weekly basis.
- A minimum of 100 active visitors on your server are necessary for a partnered Discord server, weekly.
- You need to enable a two-factor authentication requirement for Server Moderation. Go to your Server Settings and then to Moderation to enable it.