
Do you want to generate images through stable diffusion by using Google Colab but do not know how to achieve it? Well, you have come to the right place In this article, let us see how to access stable diffusion using Google Colab.
A latent diffusion model called Stable Diffusion may produce precise images from text descriptions. Additionally, it can be used for activities like inpainting, outpainting, translating words into images, and translating images into images with the use of text prompts. You can run stable diffusion in 3 ways, through web services, local installation, and Google Colab.
To access stable diffusion using Google Colab, Go to the official Google Colab page > File > select “Save a copy in Drive” > Go to stable diffusion page on hugging face > Click Access repository > Sign up > Enter email address > Enter username > Confirm email address > Create account > Go to stable diffusion’s access repository > Settings > New Token > Access token > Generate a token > In stable diffusion, go to runtime > run all > Enter token > Start generating images.
Continue reading further to understand in detail how to access stable diffusion using Google Colab and what steps are involved in it.
How To Access Stable Diffusion Using Google Colab?
To access stable diffusion using Google Colab, Go to Google Colab page > File > select “Save a copy in Drive” > Go to stable diffusion page on hugging face > Click Access repository > Sign up > Enter email address > Enter username > Confirm email address > Create account > Go to stable diffusion’s access repository > Settings > New Token > Access token > Generate a token > In stable diffusion, go to runtime > run all > Enter token > Start generating images.
Stable Diffusion is an open-sourced AI system produced by Stability AI in association with EleutherAI and LAION, much like DALL-E 2 and Midjourney. particularly, the LAION-5B subset of the larger dataset’s 512×512 images was used to train the model at a high cost. Stable Diffusion improves an image by introducing noise. The model then reverses the noise-creating process, gradually improving the image’s quality until there is none, producing a realistic image that corresponds to the text prompt.
A minimum of 6GB of VRAM (GPU) is needed to run Stable Diffusion on your computer and achieve results. The majority of us don’t have that much VRAM on our PCs, which is why Google Colab is useful and you can access stable diffusion using Google Colab. Colab is a Google-powered, completely cloud-based Jupyter notebook environment that is free to use. The notebooks can be simultaneously modified by many team members without any setup, much like you do with Google Docs documents. The catch is that Stable Diffusion requires Colab Pro because the free version’s VRAM is just a little bit insufficient for sampling. Hence, to access stable diffusion using Google Colab:
Step 1: Launch the official Google Colab page.
Step 2: Now select “Save a copy in Drive” from the menu that appears after clicking the “File” option in the top left corner of the screen to save the software to your G drive.
Step 3: Create a Hugging Face account and obtain a token are the next steps.
To Create A Hugging Face Account And Obtain A Token:
Step 3.1: Go to the Stable Diffusion page published on Hugging Face.
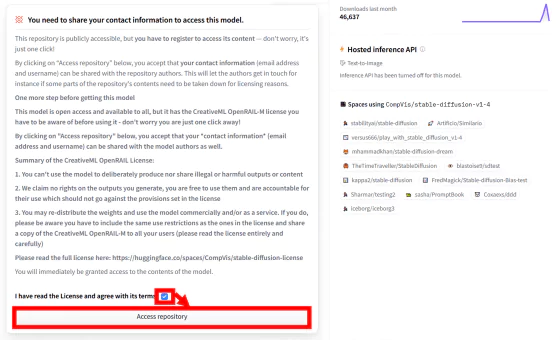
Step 3.2: Read the Stable Diffusion license acknowledgment carefully, then click Access repository.
Step 3.3: The Hugging Face login screen then appears. Choose “Sign Up” since you wanted to make a fresh account.
Step 3.4: When the box for creating an account appears, enter the email address and desired password and click “Next.”
Step 3.5: Then click “Create Account” after entering your user name and full name, reviewing the terms of service and code of conduct.
Step 3.6: Click the URL in the text, and a confirmation email will be sent to the registered email account.
Step 3.7: A Hugging Face account will be successfully created if the message “Your email address has been validated successfully”.
Step 3.8: Now, go back to the Stable Diffusion page, confirm that you accept the license, and click “Access repository.”
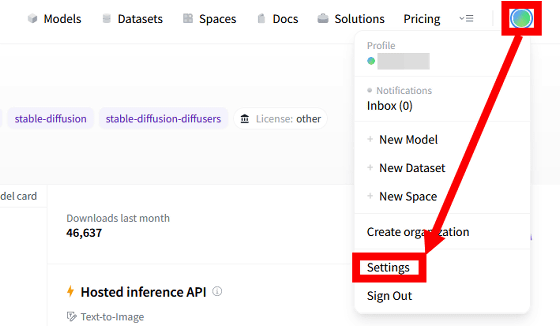
Step 3.9: Next, select “Settings” by clicking the circle icon in the top right corner of the screen.
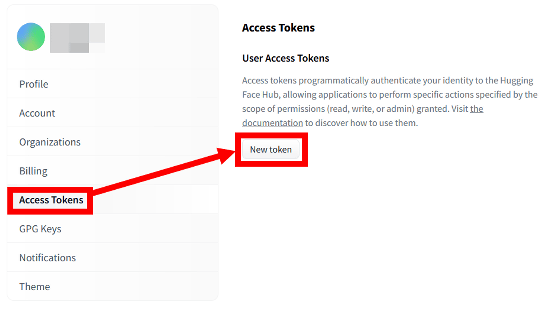
Step 3.10: When the account settings screen appears, click “New token” after selecting “Access Tokens”.
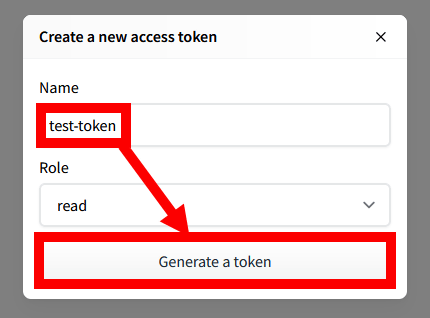
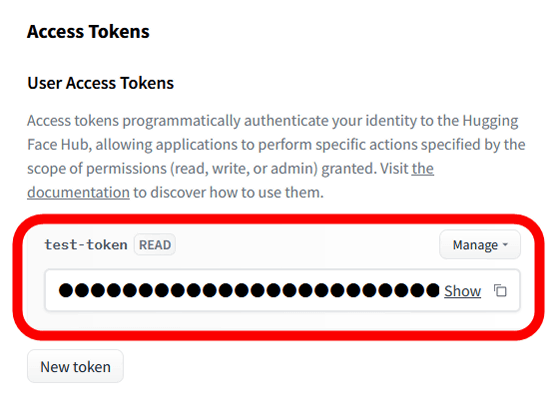
Step 3.11: When the token issue screen appears, type a name that will be simple for you to remember and click “Generate a token” and the token is successfully generated.
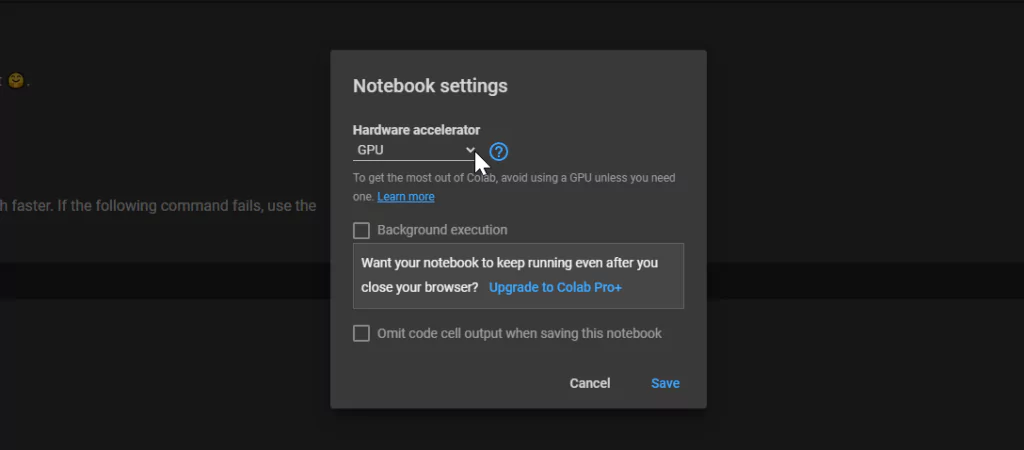
Step 4: We will need to confirm that our Google Colab is using a GPU in order to execute Stable Diffusion. To do this, select Runtime > Change Runtime Type from the menu.
Step 5: There will be a dropdown menu under Hardware accelerator in a little window that opens and it should be GPU.
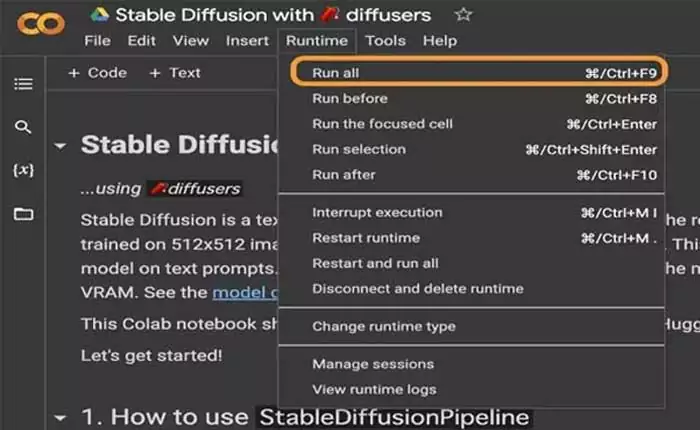
Step 6: Now go to Stable diffusion and run the application by selecting “Run all” under “Runtime.” Then wait for it to complete. When a cell is finished, a green checkmark will appear.
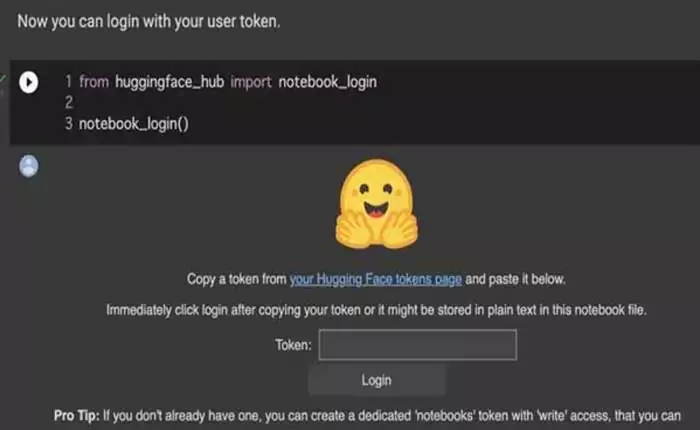
Step 7: You will be prompted for a token when you run the software; input the token that you just created and click Login.
Step 8: Now, you can start generating images by giving text prompts. Example: “Unicorn in a beach”
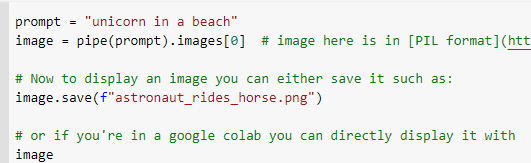

By performing these steps, you can easily access stable diffusion using Google Colab and generate images.
Wrapping Up
We have come to the end of the post and we hope this article has given you a clear explanation of how to access stable diffusion using Google Colab. For more such informative and interesting articles, check out our website at Deasilex.
Frequently Asked Questions
Q1. How Do I Access My Mounted Drive In Colab?
Ans. You will see the message “Mounted at /content/gdrive” once the Drive is mounted, and you may use the file-explorer window to browse through its contents.
Q2. How Much VRAM Does Stable Diffusion Need?
Ans. On weeb things, the Stable Diffusion model is refined. A model that was trained on 56k photos from the anime/manga painting website Danbooru. A minimum of 30GB of VRAM is required.
Q3. How Do I Access Data On Google Colab?
Ans. Go to Google Drive after signing into your Google Account to get started. If Colaboratory is already installed, click the New button on the left and choose that option, then import Pandas.
Q4. How Do I Read A Dataset In Google Colab?
Ans. Click INSERT after you’ve scrolled down to Open files from Google Drive. Access Colab by going to the URL link on your browser, copying the authorization code, and pasting it into the box provided in the notebook. All of your Drive datasets are now readily accessible on Colab.
Q5. Why Is My GPU Usage Not Stable?
Ans. Because you are utilizing integrated graphics, there’s a driver problem, your CPU is overloaded, the game you’re playing isn’t optimized, and your GPU utilization is very low. Reinstalling drivers, updating or overclocking your CPU, and modifying some game settings are potential remedies.