
Are you also having the issue Mastodon too many requests? Well, no need to worry! In this article, you will get an answer to how to fix Mastodon too many requests.
Too Many Requests Mastodon is basically an error named error 429 and Mastodon fehler 403 which arises as your server is being overloaded by a user or a piece of code that is making too many requests. The issue may occasionally disappear on its own. You’ll need to take proactive measures to fix the error in other circumstances, such as those brought on by plugin-related problems or Denial of Service (DDoS) assaults.
To fix Mastodon too many requests, you need to temporize the requests to Mastodon, Open Mastodon > Settings > Account settings > Fill in credentials > Privacy and Security > Select Requests > Timeline > Temporize. Also, clear the media cache, change the Mastodon server, and ask Mastodon to open Floodgates. Usually, there is a cooldown and everything goes back to normal. If not, try to disable the resolution tags on the thumbnails, if you are using that feature.
To know in detail about how to fix Mastodon too many requests error? Read the full article. This blog post shall incorporate everything you need to know about how to fix too many requests Mastodon error and also about Mastodon signup failure.
How To Fix “Mastodon Too Many Requests”?
A lot of users are facing Mastodon too many requests error problems since the day Elon Musk took the charge of Twitter and millions of users started migrating to Mastodon, which cause the site to crash and even the issue of email confirmation not being received. We have already solved that problem. Now, we are here to help you with how to fix Mastodon too many requests. Let’s begin!
Way 1: Temporize The Requests
To Mastodon social too many requests > Open Mastodon > Settings > Account settings > Fill in credentials > Privacy and Security > Select Requests > Timeline > Temporize.
Step 1: Open Mastodon on your device.
Step 2: Go To Settings.
Step 3: After that, Go to Account settings.
Step 4: Now, fill in your email and password.
Step 5: After that, click on Privacy and security.
Step 6: Select Requests and select the timeline to temporize them.
This will solve your issue of how to fix Mastodon too many requests error.
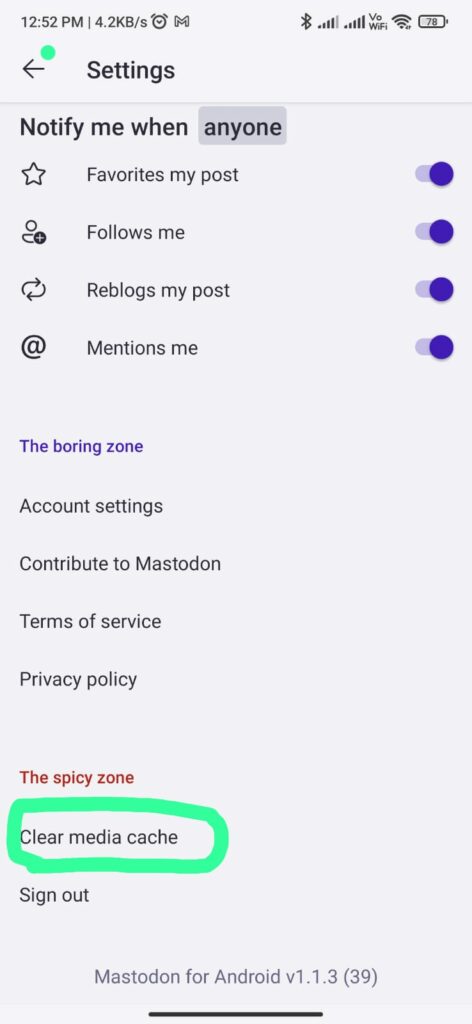
Way 2: Clear Media Cache
To “Mastodon too many requests” > Open Chrome > Settings > Privacy and Security > clear browsing data > select the time range to All time > clear data > open Mastodon > Settings > Clear media cache.
As Mastodon is a web-based application, so there might be a chance that mastodon too many requests error arises due to any plugin in chrome. So, it’s better to clear the Mastodon clear cache and browsing history. Let’s see how to Mastodon clear cache.
Step 1: Open Chrome and click on the 3 vertical dots at the top right corner.
Step 2: Now, scroll down to find settings and click on it.
Step 3: After that, click on Privacy and Security.
Step 4: Now, click on clear browsing data and select the time range to All time.
Step 5: Uncheck the Browsing history and cached Images and media files.
Step 6: Click on clear data and open chrome.
Step 7: Now, open Mastodon on your device.
Step 8: Go to settings and click on Clear media cache.
This Mastodon clear cache will help you solve too many requests Mastodon error issue.
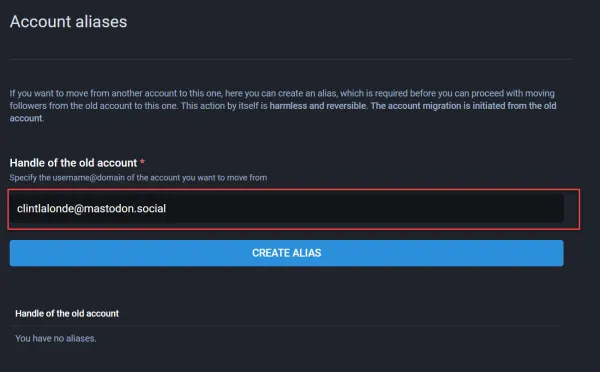
Way 3: Change Mastodon Server
To mastodon too many requests > Open Mastodon > Register a new server > Account > Moving from another account > Type old account handle > Account > Moving to another account > Type the new account handle.
Step 1: Open Mastodon on your device.
Step 2: Register with a new server.
Step 3: Navigate to Account > Moving FROM another account.
Step 4: Type the old account’s handle.
Step 5: Access Account > Moving to another account on the OLD server.
Step 6: Type the handle of the new account and submit.
This will help you to fix your problem of how to fix Mastodon too many requests error.
After doing all this, if you are still having the same issue then this is the last resort. Read ahead to find out.
Way 4: Contact Mastodon And Ask Them To Open Floodgates
In some instances, it’s possible that the cause behind the 429 Mastodon too many requests error originated with your server. If this is the case for you, no amount of work on your part will be able to fully resolve the problem. You need to ask for help from Mastodon itself and wait it out until they open the floodgates. They will help you with too many requests Mastodon error issue.
Conclusion:
Errors are always a bummer and hinder your experience in exploring the features. Don’t worry, we have got you covered. In this article, we have mentioned every possible solution how to fix Mastodon too many requests error and mastodon registration forbidden. We hope you find it useful. Keep following Deasilex.
Frequently Asked Questions
Q1. What Is Mastodon 403 Error?
Ans. A 403 error often indicates that a server has rejected your request to perform an action or obtain data. Incase of Mastodon error 403, Mastodon has the capability to limit server access to those who have received an invitation. The 403 banned notice will appear if you choose an invitation-only server when attempting to establish an account.
Q2. What Does Mastodon Signup Forbidden Means?
Ans. Mastodon signup forbidden is another name for Mastodon 403 Error which appears when you choose an invitation-only server when attempting to establish an account. or Mastodon sign up failure
Q3. What Is Mastodon Fehler 403?
Users have raised complaints, and have been facing issues in accessing contents, while using the app and one of them is Mastodon fehler 403. Let us see how to fix Mastodon Error 403 – Forbidden.
1. Check the address
2. Refresh the page
3. Clear your browser cache
4. Clear browser cookies
5. Contact the website
6. Disable WordPress
7. Check your internet connection
8. Contact your ISP
9. Disconnect from VPN
10.Scan for Malware
11.Try again later.