
Have you ever faced an issue while running the Windows built-in Network troubleshooter for fixing the internet issues? An error might appear on your screen that says that the remote device won’t accept the connection. If this is the case, you have landed on the very right page. In this post, we will be discussing “How to Fix the Remote Device Won’t accept the connection error”.
There are a lot of times when you can face such an error. Many reasons can be responsible for such errors. It might be because of your network settings. Since the error does not tell you what is needed to be fixed, you need to rely on multiple standard fixes for resolving this issue. This post will help you in knowing “How To Fix The Remote Device Won’t Accept The Connection error”.
Confused about “How to fix the Remote Device won’t accept the connection error”? You can try out some common fixes to resolve this issue. Try turning off your proxy settings or you can try resetting your web browser. Another fix to try is disabling your Windows Firewall. You can try these ways for solving the issue you are facing. If these fixes are not working, we have got more to try out further in the post.
Here is a post that will discuss “How to fix the Remote Device Won’t accept the connection error”. We will explain the ways that can be tried for fixing an issue like this. So, be with us until the end to get more details about “how to fix the remote device won’t accept the connection error”. Let us now dive straight into the post and start with “How to fix the Remote Device won’t accept the connection error”.
How To Fix The Remote Device Won’t Accept The Connection Error?
Are you facing an error while running the Windows built-in Network troubleshooter for fixing any internet issues? To learn “How to fix the Remote Device won’t accept the Connection error”, you can try fixes such as turning off your proxy settings, disabling Firewall, and more. Let us find out How To Fix The Remote Device Won’t Accept the connection error in more detail.
Fix 1: Disabling The Proxy Server
The first fix to try out to understand “How to fix the Remote Device won’t accept the connection error” is disabling your proxy server. One of the possible reasons why you are facing the remote device won’t accept the connection error is the server of the proxy. When Proxy is enabled, Network data gets transmitted differently than when its disabled. Hence, you should try turning off your proxy server and see if it helps. Here are the steps you need to follow.
1. Press the Windows + R keys at the same time to open the Run box.
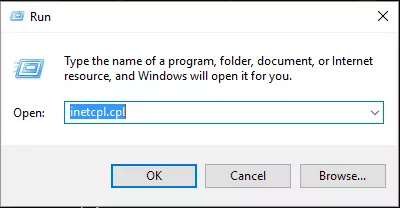
2. You now need to type inetcpl.cpl in the Run box and hit the Enter button.
3. Tap on the Connections tab in the Internet Properties windows that will open up.
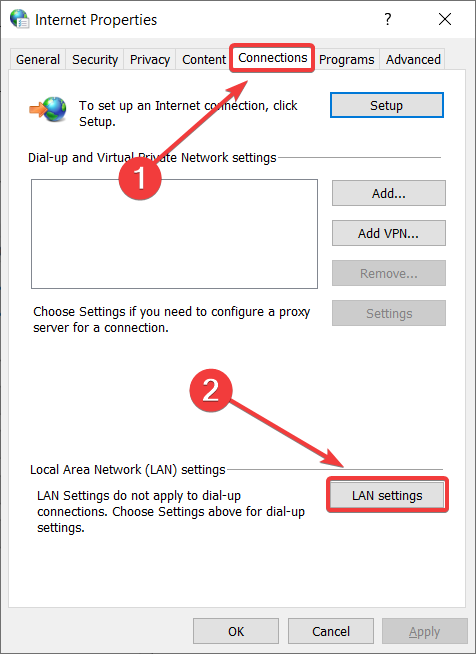
4. Click on the LAN Settings tab from the bottom of the Connections tab.
5. You now need to disable the Use a proxy server for your LAN option from the Local Area Network Settings Window. Then, press the OK option.
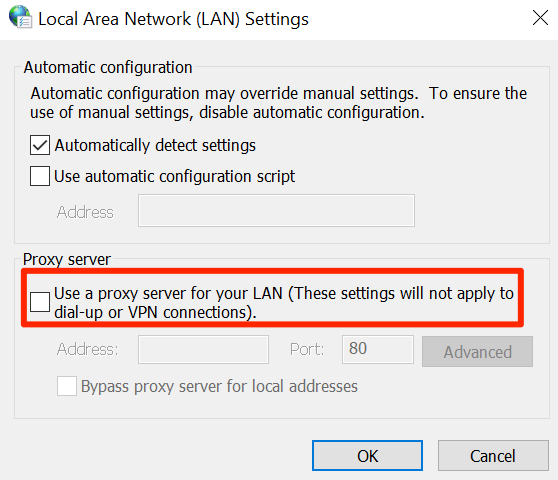
6. On the Internet properties window, you need to click on Apply and then, press the OK tab.
These steps might be helpful in fixing the issue that is faced by you. Try this fix and if it doesn’t work, try another one to know How To Fix The Remote Device Won’t Accept The Connction Error.
Fix 2: Disabling Windows Firewall
Windows Firewall defines the working of your outgoing and incoming network connections. There might be a rule in your firewall that is blocking certain connections and cause your PC to display this “The Remote device won’t accept the connection error”. So, you can try turning off the Firewall temporarily and check if that is helpful in resolving the problem. Try these steps for disabling Windows Firewall.
1. Open Control Panel on the PC. For doing so, click on the Start button > Search for Control panel in the search option > Press the Control Panel option.
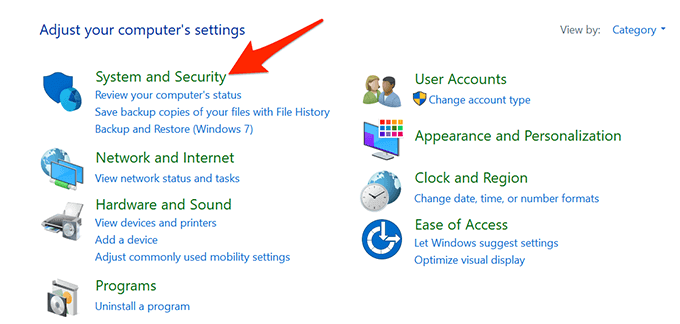
2. Press the System and Security option.
3. Click on the Windows Defender Firewall option.
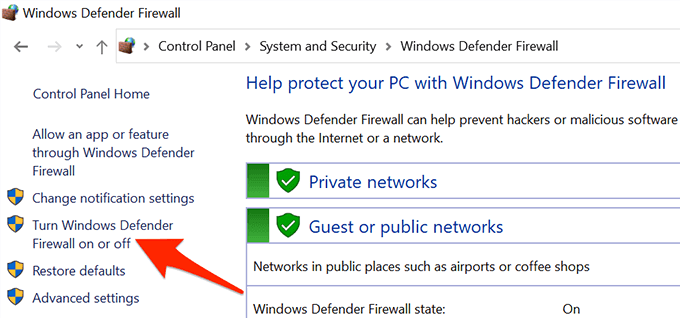
4. From the left side of the screen, tap on the Turn Windows Defender Firewall on or off option.
5. You now need to activate the Turn off Windows Defender Firewall option in the Private and Public Network Settings.
6. Press the OK button.
This might be helpful in resolving the issue you are facing. If not, try out another way on How To Fix The Remote Device Won’t Accept The Connection error.
Fix 3: Resetting Your Web Browser
It might be possible that you might this issue of the remote device not accepting the connection. Another common way to learn How to Fix The Remote Device Won’t Accept The Connection Error is to reset your web browser. You can try resetting whatever browser you are using. Here are the steps you need to follow.
1. Launch the browser on your PC.
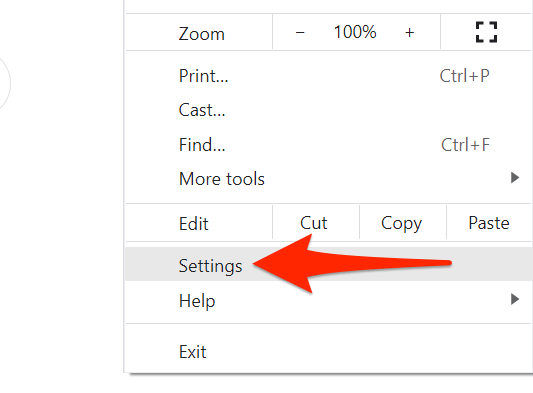
2. Tap on the three dots option where you will find the Settings option. Select settings.
3. Then, select the Advanced button.

4. Press the System option.
5. Press on the Restore settings to their original defaults option.
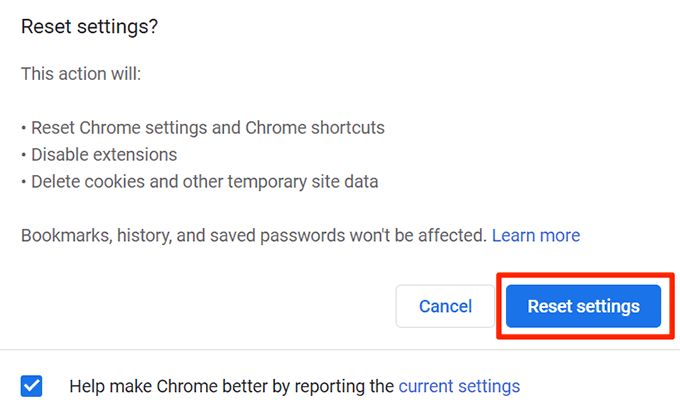
6. Select the reset settings from the prompt.
This fix might help you in resolving the issue. If not, check out another fix to solve the problem you are facing.
Fix 4: Turning Off Antivirus
Another major reason why you are facing such an issue can be the Antivirus. It might be interfering with your connections. Maybe your Antivirus is blocking connections and that’s the reason the Network troubleshooter is displaying The remote device won’t accept the connection error. You can try fixing this by turning off your Antivirus. This might fix the problem.
Fix 5: Releasing And Renewing IP Address
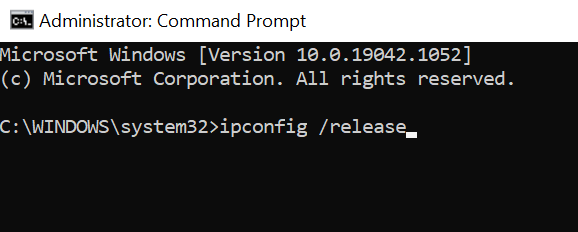
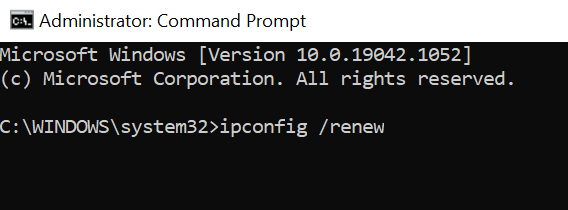
Releasing and renewing your PC’s IP Address is another effective fix that can be helpful in resolving the problem you are facing. You can run a few commands and this might resolve the issue you are facing. Here is what you need to do.
1. Right-click on the Start menu on your PC. Select the Command Prompt (Admin) option from the menu.
2. In the User Account Control prompt, you need to select Yes.
3. Type the following command in the Command prompt window and tap the Enter button.
4. Once the above command is executed, type the following command, and press the Enter button.
5. You can now close the Command prompt window.
This might be helpful in fixing the problem you are facing.
Fix 6: Updating Group Policies
Your Network Administrator might have made some changes to Group policies. These policies will go into effect after 90 minutes, so you might need to wait. However, you can expedite the process using a command on the PC. Here is what you can do.
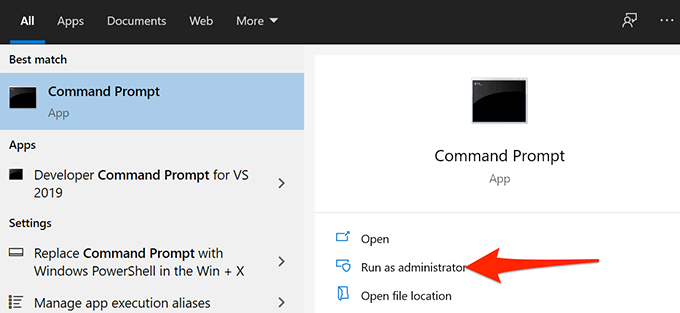
1. Open the Start menu on the PC and look for Command Prompt. Then, choose the Run as Administrator option.
2. In the User Account Control prompt, select the Yes option.
3. Type the following command in the command prompt window that opens and click the Enter tab.
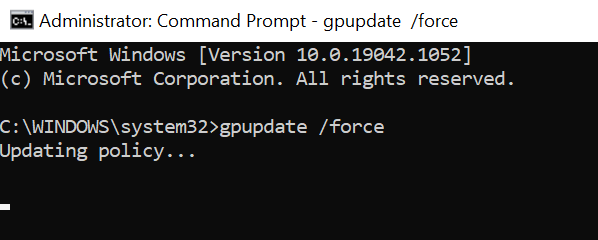
4. Wait until your PC updates the group policies.
5. Once the policies are updated, restart the PC. For doing so, open the Start menu and select the power button and finally press the restart button.
Hopefully, the fixes that have been mentioned above are helpful in fixing the problem you are facing. You can also try these ways on How To Fix The Remote Device Won’t Accept The Connection Error.
Wrapping-Up:
Here ends the post on How To Fix The Remote Device Won’t Accept The Connection Error. In this post, we have mentioned all the possible fixes that can be tried out for solving this issue. You can try these fixes for resolving the remote device error. Tell us which fix helped in solving your problem. Are you aware of any other fix to solve the remote device not accepting the connection error? Share it with us in the comments. If you find the post on How To Fix The Remote Device Won’t Accept The Connection Error informative and useful, share it with others!
Frequently Asked Questions
Q1. What Can I Do If The Remote Device Or Resource Won’t Accept The Connection Error Is Showing?
A. There are many times when you might face this error. You can try some common fixes for solving this problem. You can try to disable the proxy server or work on to reset your web browser. You can also try to turn off Antivirus as another fix to solve the problem you are facing. These fixes might be helpful in solving your issues.
Q2. What Is Remote Server Not Responding?
A. You might face an issue that your Remote server may not respond. You can resolve this issue by try out some fixes. Try to download and install the latest version of the Creative cloud Desktop application. You can then try closing all Adobe applications including the PDApp. Then, restart your web browser. This might be helpful in fixing your problem.
Q3. How Do I Fix The Device Or Resource Web Proxy Is Not Set Up To Accept Connections On Part 8080?
A. You can try some fixes for the device or resource web proxy not set up to accept connections on part 8080. Try fixing it by connection settings. Here is what you need to do.
- Start Internet Explorer.
- Tap on the Tools menu and then press the Internet options.
- Press the Connections tab.
- You will find broadband connection under Dial-up and VPN settings, tap on that.
- Press the Settings button and then press automatically detect settings.
- Press on the OK button.
This might turn out to be useful in resolving the problem you are facing.
Q4. How Do I Disable Proxy Settings?
A. Here is what you need to do for disabling proxy settings on Google Chrome. Let us see what you need to do.
- You will find the open your computer’s proxy settings option in the System section. Click on that.
- You will see Automically detect settings under Automatic proxy setup. Switch it off and use Setup script.
- Look for Use a proxy server option just under Manual proxy set up. Switch it off and press the save button.
This is how you can disable the proxy settings.