
Started a free trial of an app that you don’t use and are still paying bills of the same? You must be quite loaded hah! If not then what explains such lavish slip-ups? Whatever the reason, this session is for pals who are regretting the auto renewal of subscriptions on iPhone that they don’t use or need anymore and thus, would like to cancel out any additional charges. Here’s how to turn off auto renew on iPhone to save charges from apps that you no longer use.
If you don’t want to be charged for an app after the free trial is over, make sure you cancel the auto renew feature for that specific app to save bucks from being deducted from your account. Doing so is easy peasy, so let’s see how you can do that!
There are two ways in which you can turn off auto renew on your iPhone for apps that you don’t want to use in the future. You can either cancel the subscription for the specific app from your iPhone settings or you can do the same from your App Store app itself.
Below we have mentioned all the possible ways in which you can turn off auto renewal of apps in iPhone iOS 12, 13, and 14. So without further delay, let’s get on with it!
Auto Renewal Of Subscriptions On iPhone
Many apps offer free trials first and then they start charging monthly or yearly payments based on our choice of subscription afterward. This happens quite often that we subscribe to an app and just forget to use it later on due to various reasons. We might not like the app or we simply don’t find it as useful as we did before.
Even if we no longer use the app, the deductions will still be made if we have subscribed to automatic renewal of subscriptions. In such cases, if you don’t want to pay extra money for the services that you don’t use and would to like save some bucks, then it would be better to cancel out such subscriptions.
However, do keep in mind. Simply deleting or uninstalling an app with auto renewal will not turn off the auto renewal feature. You have to follow some steps to turn off auto renew on iPhone to get rid of unnecessary expenses.
If you want to cancel your iTunes, Hulu, or any other subscription with auto renewal, then keep reading to find out ways by which you can turn off auto renew on iPhone.
How To Turn Off Auto Renew On iPhone?
To turn off auto renew on iPhone, you have to go to your iPhone settings and make some changes in there in order to avoid additional expenses. However, before proceeding further, you need to keep in mind that every iOS update is different (that goes without saying) and so are their settings. Where iOS 14 has made everything easier to find, earlier versions like iOS 11 or iOS 12 aren’t so.
We have to probe deeper into our iPhone settings to turn off auto renew in iOS 12 or below than iOS 13 or above. So keeping such changes in mind, we have curated a list of steps to turn off auto renew in different iOS versions on iPhone.
How To Cancel Auto Renewal In iOS 12 Or Below?
To cancel auto renewal of subscriptions in iOS 12 or below, follow the below-mentioned steps carefully.
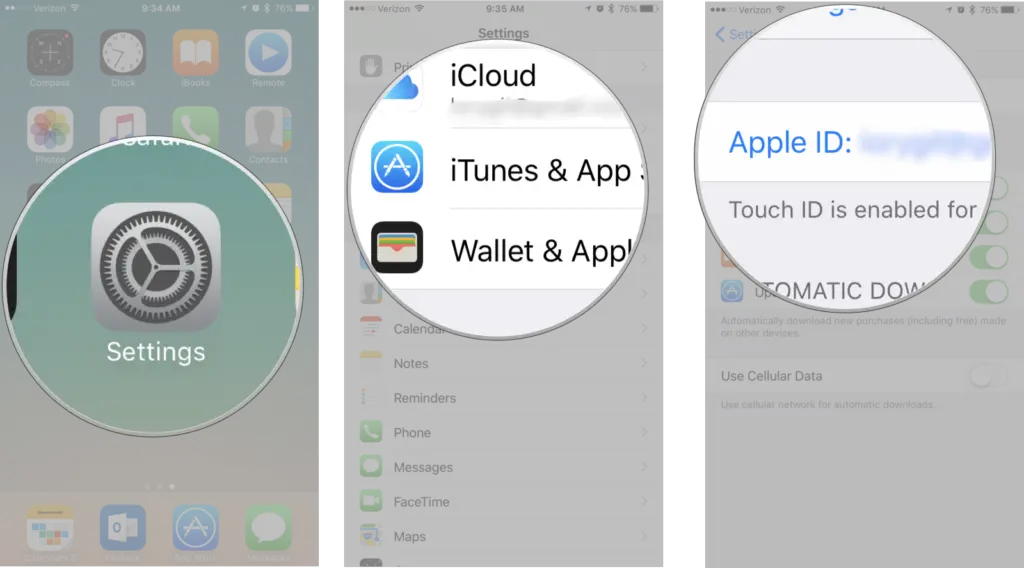
Step 1: Open your iPhone and then tap on “Settings” from the home screen.
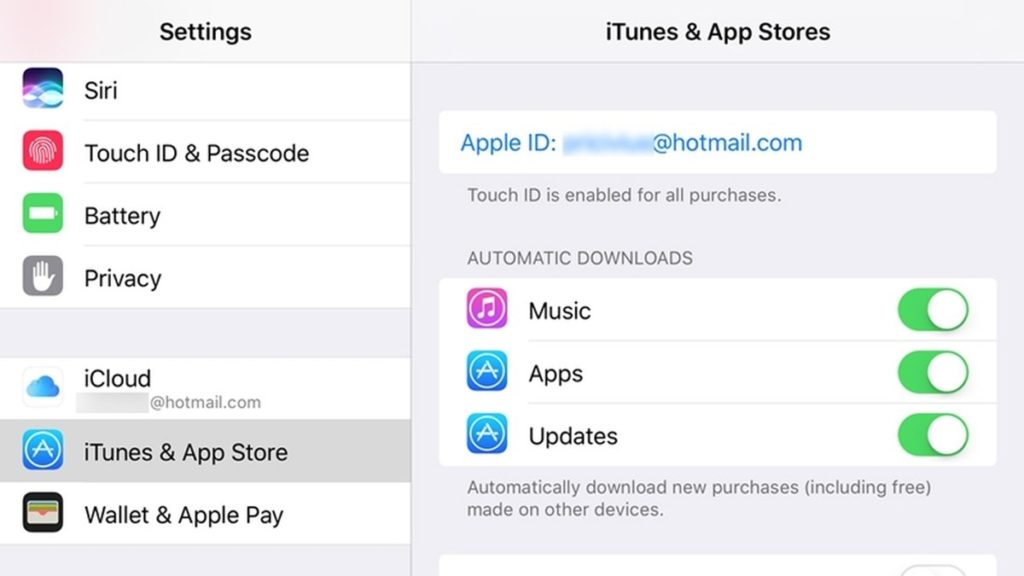
Step 2: Scroll down in the settings and click on the “iTunes & App Store” tab.
Step 3: In the “iTunes & App Store” settings, click on your “Apple id with email” on the top.
Step 4: Hit on “View Apple id” and then confirm it with your Touch id, or face id.
Step 5: Scroll down in your account settings and tap on “Subscriptions”.
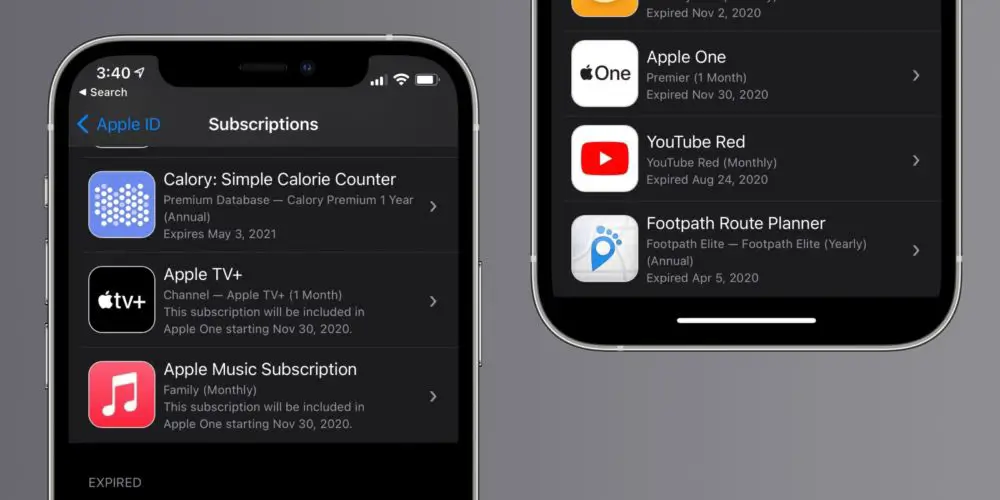
Step 6: A list of subscriptions will appear under the “Active” and “Expired” options.
Step 7: Click on the active subscription that you want to cancel and then tap on “cancel”.
Step 8: Again click on “Confirm Cancellation” and the specific app will be canceled from auto renewal.
Also Read: How To Turn Off Read Receipts On Instagram? 2 Easiest Hacks To Try!!
How To Cancel Auto Renewal In iOS 13 & iOS 14?
Turning off auto renew on iOS 13 and above versions is a piece of cake. Let’s look at the steps by which you can successfully do the same.
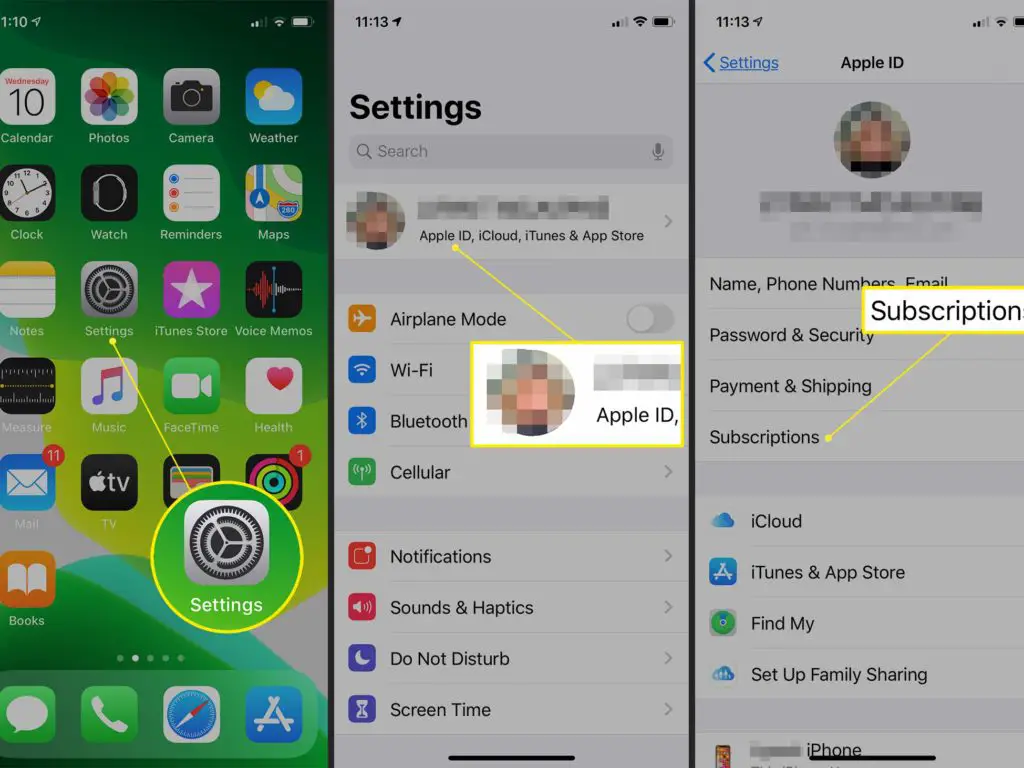
Step 1: Open your iPhone and go to “Settings” from your home screen.
Step 2: Tap on your Apple id on the top of the iPhone settings.
Step 3: In your Apple id settings, catch hold of “Subscriptions” and then tap on it.
Step 4: A list of “Active” and “Expired” subscriptions will appear under the subscription settings.
Step 5: Click on the active subscription whose auto renewal you’d like to cancel.
Step 6: Tap on the “Cancel Subscription” option below and then again tap on “Confirm Cancellation”.
Step 7: The specific app subscription will be canceled from auto renewal.
Don’t want to mess with your iPhone settings? Then we have another way to turn off auto renew on iPhone! All you have to do is tap on your App Store and manage your subscriptions through App Store alone. Here’s what all you need to do to turn off Auto renew in iPhone from App Store.
Step 1: Open your iPhone and tap on the “App Store” app from your home screen.
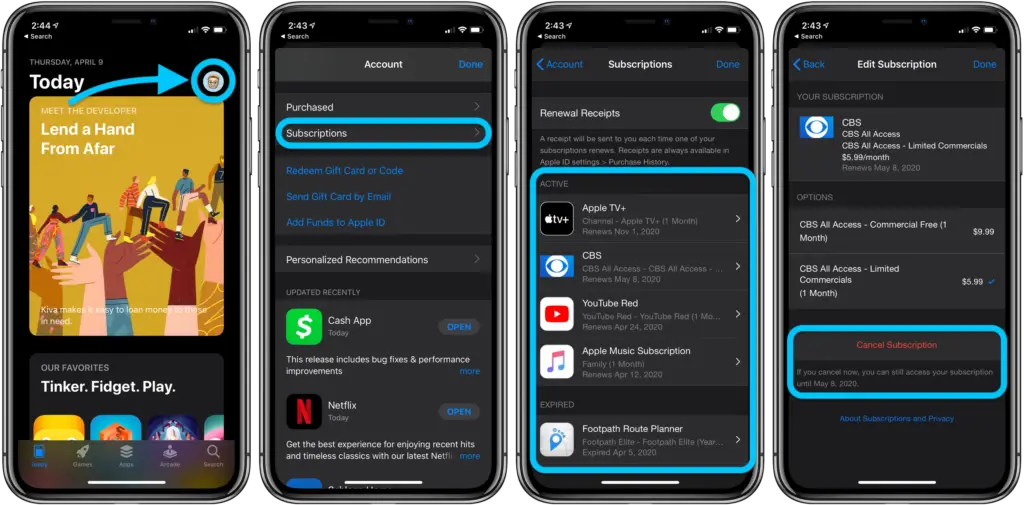
Step 2: Click on the “Apps” tab below and then tap on the “Profile” icon on the top right.
Step 3: Tap on “Manage Subscriptions” in the App Store account settings.
Step 4: A list of “Active” and “Expired” subscriptions will appear under the manage subscription tab.
Step 5: Click on the active subscription whose auto-renewal you’d like to cancel.
Step 6: Tap on the “Cancel Subscription” option below and then again tap on “Confirm Cancellation”.
Step 7: The specific app subscription will be canceled from auto renewal.
How To Turn On Auto Renew On iPhone?
Are you regretting canceling auto renewal of subscriptions now and want to turn them on? Don’t worry! Here’s how you can turn on your canceled or expired subscriptions for auto renewal for a second time.
Turn On Auto Renew In iOS 12 Or Below
If you have iOS 12 or later version, here’s what you’ll need to do to turn on the auto renewal of app subscriptions.
Step 1: Open your iPhone and then tap on “Settings” from the home screen.
Step 2: Scroll down in the settings and click on the “iTunes & App Store” tab.
Step 3: In the “iTunes & App Store” settings, click on your “Apple id with email” on the top.
Step 4: Hit on “View Apple id” and then confirm it with your Touch id, or face id.
Step 5: Scroll down in your account settings and tap on “Subscriptions”.
Step 6: A list of subscriptions will appear under the “Active” and “Expired” options.
Step 7: Click on the expired subscription that you want to renew and then tap on a plan that suits you best. There might be a list of options ranging from monthly to yearly plans.
Step 8: After selecting a plan, renew it by confirming your Apple id first and then paying for the subscription.
Step 9: Your selected subscription will get renewed on the date mentioned on your subscription plan.
How To Turn On Auto Renew In iOS 13 & iOS 14?
To turn on the auto renew of expired subscriptions on iOS 13 and above, follow the below-mentioned steps.
Step 1: Open your iPhone and go to “Settings” from your home screen.
Step 2: Tap on your Apple id on the top of the iPhone settings.
Step 3: In your Apple id settings, catch hold of “Subscriptions” and then tap on it.
Step 4: A list of “Active” and “Expired” subscriptions will appear under the subscription settings.
Step 5: Click on the expired subscription whose auto renewal you’d like to activate and then tap on a plan that suits you best.
Step 6: Tap on the “Cancel Subscription” option below and then again tap on “Confirm Cancellation”.
Step 7: After selecting a plan, renew it by confirming your Apple id first and then paying for the subscription.
Step 8: Your selected subscription will get renewed on the date mentioned on your subscription plan.
Also Read: How To Turn Off Messages On iPad From iPhone?
Wrapping Up
Auto renewal of app subscriptions can be quite a hassle, especially if we don’t use those apps which we’re paying for. So, in order to manage our expenses, we have to cancel the subscriptions we no longer use.
Turning off auto renew in iPhone is quite easy. You can either turn the active subscriptions off from the App Store itself or you can change it from your iPhone settings. Choose whichever way best suits you best!
Frequently Asked Questions
Q. How Do I Turn Off Auto Renewal On iOS 14?
Turning off auto renew on iOS 14 and above versions is a piece of cake. Let’s look at the steps by which you can successfully do the same.
Step 1: Open your iPhone and go to “Settings” from your home screen.
Step 2: Tap on your Apple id on the top of the iPhone settings.
Step 3: In your Apple id settings, catch hold of “Subscriptions” and then tap on it.
Step 4: A list of “Active” and “Expired” subscriptions will appear under the subscription settings.
Step 5: Click on the active subscription whose auto renewal you’d like to cancel.
Step 6: Tap on the “Cancel Subscription” option below and then again tap on “Confirm Cancellation”.
Step 7: The specific app subscription will be canceled from auto renewal.
Q. How Do I Turn Off Auto Renewal On My iPhone?
There are two ways in which you can turn off renew on iPhone for apps that you don’t want to use in the future. You can either cancel the subscription for the specific app from your iPhone settings or you can do the same from your App Store app itself.
Featured Image Credits: 9to5Mac