

Are you stuck in the middle of the project just because you can’t flip the image in Google Docs? We all have been there! If this is the case, then you don’t need to worry anymore because here we are with an article that will tell you about different methods on “How To Flip An Image On Google Docs.”
Google Docs is undoubtedly the best word application available worldwide. Literally! The platform has several features that can be accessed free of cost. One such feature is a mirror image. Flipping an image vertically or horizontally is known as mirroring the image. This article will tell you three different methods that can be used to flip an image in Google Docs.
How To Flip An Image In Google Docs?
There are three different ways to flip the image. The simplest and easiest way is by rotating the circle present on the anchor point of the image. The other two methods are a bit lengthy, but they will flip the image with perfect accuracy.
Fret not, all the three methods are explained in the article below in great detail. You will find the step-by-step guide of these methods below.
Flip An Image In Google Docs
An image can be flipped in two major types, either you can make it upside down, which is also known as downside up, or you can make a mirror image, in which the right will appear on the left side and the left will appear on the right. To achieve these reflections, Google Docs provides us three legitimate ways on its platform. So, let us have a look at these three ways one by one.
Method 1: How To Reflect An Image In Google Docs
Let us start with the first method, you have to upload the image to Google Docs first, and you can go to the settings to flip the image. Don’t worry, a step-by-step guide procedure is given below.
Insert The Image in Google Docs
- Open the Google Docs on your desktop.
- Now, from the menu provided on the top, click on “Insert”.
- A drop-down menu will appear in front of you. From the menu select “Image”.
- Next, click on “Upload from computer” and you will be directed to your computer’s internal storage.
- Select the image you wish to upload and click on open.
- This will include the image in Google Docs.
Cut The Image
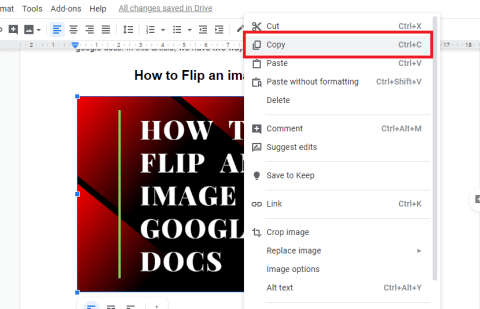
After the image is uploaded to Google Docs, you have to cut the image. This can be done by clicking on the image and pressing the “Ctrl + X” keys on your keyboard if you are using Windows. Or type “Command + X” if you are using a Mac. Or you can simply right-click on the picture and from the list of menus that appears select “Cut”. After that, follow the procedure given below.
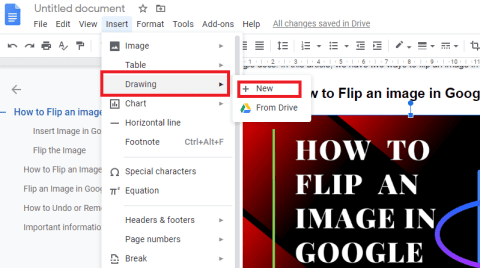
- From the menu provided on the top, click on “Insert”.
- A drop-down menu will appear in front of you. From the menu, select “Drawing”.
- Now, click on “New” and this will open another page in front of you.
Paste The Image
Now, on the next screen that appears on the desktop, paste the image that you copied. This can be done by clicking on the image and pressing the “Ctrl + V” keys on your keyboard if you are using windows. You can press “Command + V” if you are using a Mac. Also, you can simply right-click on the screen, and from the list of menus that appears select “Paste”.
Flip The Image In Google Docs

After you have pasted the image in the drawing option, follow the steps given below.
- Right-click on the image that you have pasted.
- A list of drop-down menus will appear in front of you, navigate to the option that says “Rotate”.
- After you click on rotate, you will be given four options-
- Rotate clockwise By 90°
- Rotate anti-clockwise By 90°
- Flip Horizontally
- Flip Vertically
- Select the one you wanted to and save the image. You will find the “Save and Close” option in the top right corner of the screen.
You have successfully flipped an Image in Google Docs.
Method 2: How To Reverse An Image In Google Docs
This method is the easiest way to flip an image in Google Docs. All you have to do is have control over your cursor. Don’t get confused, we have mentioned the step-by-step procedure below.
- You will start with uploading the image in Google Docs.
- For uploading, click on the insert option present on the top menu.
- Now, click on the option “Upload from computer”.
- Next, select the image you wish to upload and click on “Open”.
- This will insert the image in Google Docs.
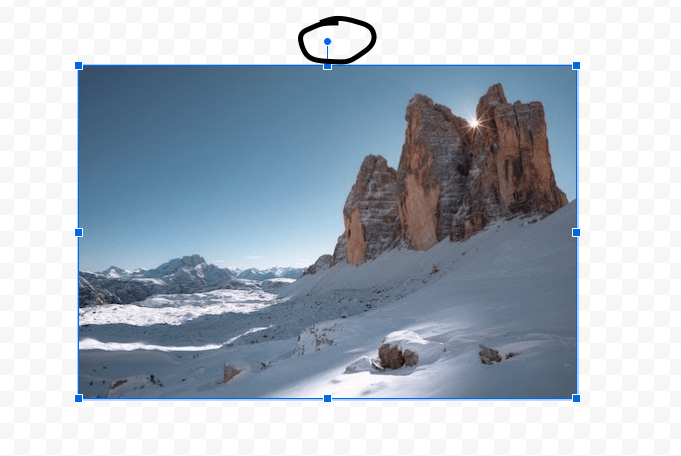
- Now, click on the image and take your cursor to the circle present on the top middle anchor.
- Click on the circle and hold the left mouse button and start tilting the image.
- This method will give you the freedom of tilting the image to the degree you wish.
- The autosave will automatically save this image in Google Docs.
Method 3: How To Mirror An Image In Google Docs
This method of mirroring the image in Google Docs is almost similar to the first method that we discussed above. There are only a few changes in the last steps. Follow the steps given below to mirror an image in Google Docs.
Insert The Image in Google Docs
- Open the Google Docs on your desktop.
- Now, from the menu provided on the top, click on “Insert”.
- A drop-down menu will appear in front of you. From the menu select “Image‘.
- Next, click on “Upload from computer” and you will be directed to your computer’s internal storage.
- Select the image you wish to upload and click on open.
- This will include the image in Google Docs.
Cut The Image
After the image is uploaded to Google Docs you have to cut the image. This can be done by clicking on the image and pressing the “Ctrl + X‘” keys on your keyboard if you are using Windows or “Command + X” if you are using a Mac. You can also simply right-click on the picture and from the list of menus that appears select “Cut”. After that follow the procedure given below.
- From the menu provided on the top, click on “Insert”.
- A drop-down menu will appear in front of you. From the menu select “Drawing”.
- Now, click on “New” and this will open another page in front of you.
Paste The Image
Now, on the next screen that appears on the desktop paste the image that you copied. This can be done by clicking on the image and pressing the “Ctrl + V” keys on your keyboard if you are using windows or “Command + V” if you are using a Mac. Or you can simply right-click on the screen and from the list of menus that appears select “Paste”.
Mirror The Image In Google Docs
After you have pasted the image in the drawing option, follow the steps given below.
- Click on the image that you have pasted.
- Hold the center anchor of the left side of the image and shrink the image to the right.
- Next, hold the center anchor of the right side of the image and drag it to the extreme left side of the screen.
- You have successfully mirrored your image.
Conclusion
We hope that now you are clear with “How To Flip An Image On Google Docs”. If you find this article informative then do share it with your friends.
Also, if you have any other queries regarding anything on Google Docs then feel free to ask us in the comments section. We will reply to you as soon as possible.
Featured Image Source: Guiding Tech