
Do you want to increase visibility to your Instagram profile by adding location on Instagram bio? Well, you have come to the right place. Let us see how to add location on Instagram bio.
Instagram has both a personal account and a professional account with which the user can create an account that best suits their needs. It is crucial to include the location details on your IG bio as it increases more traffic to your business.
To add location on Instagram bio while setting up a new account, Start Instagram > Touch the hamburger icon > Tap the Profile icon > Choose settings > Choose Account > Tap the Switch to professional account button > Tap Continue four times > Choose any “Business category” > Tap Done > Tap Ok > Select Business > Press Next > Enter your company’s email address and phone number > Choose Business address > Enter details > Hit save.
The best way to attract a potential customer is to mention the location as the user has the privilege of viewing the address and deciding whether it is convenient for him to travel. So, without further ado, let us get into the topic of how to add location on Instagram bio and what steps are involved in it.
How To Add Location On Instagram Bio?
To add location on Instagram bio for an already existing account, Launch Instagram > Go to your Business Account > Choose the Profile icon > Choose Edit Profile > Go to the Contact page > Choose the Business address > Provide your street address and other details > Go to contact choice section > Choose the Tick icon > Tap tick icon in edit profile page.
Instagram bio is the first and foremost thing anyone notices when the user lands at an Instagram page. So, it is necessary to define your bio in a manner that gives a brief idea about who you are and what you do. For a professional IG account, it is essential to create the bio in such a way that you do not miss to add location on Instagram bio.
There are high chances of the customer leaving the page when he is unable to find the contact information. It stops the user from placing an order as the user is not exactly sure of where it is situated. Only a very few spend time researching the location themselves by surfing the internet. A majority of the users will expect the information to be handy. As a business owner, it is crucial to keep in mind these points and create your bio in such a way that it attracts potential customers.
How To Add Location On Instagram Bio For A New Account?
You can add location on Instagram bio if you are setting up a professional IG account for the first time. To do so:
Step 1: Start Instagram app.
Step 2: Touch the three lines in the upper right corner.
Step 3: Tap the Profile icon and choose settings.
Step 4: Now, Choose Account.
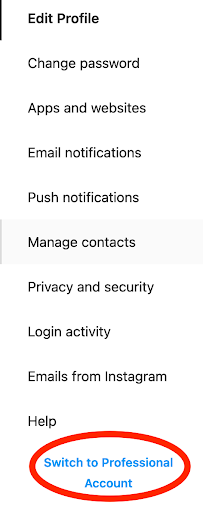
Step 6: Scroll down and tap the Switch to professional account button.
Step 7: Tap Continue four times in the new tab.
Step 8: Choose any “Business category” and tap Done.
Step 9: In the pop-up box, tap OK.
Step 10: In the new window, select Business and then press Next and Hit Next once more.
Step 11: Now, enter your company’s email address and phone number.
Step 12: Choose the choice for a “Business address”.
Step 13: Enter the street address, city/town, and ZIP code, then click Save.
With these steps, you can easily add location on Instagram bio creator account.
How To Add Location On Instagram Bio For An Existing Account?
Even if you already have a Business account, and you have not added the location yet, you can still put location on IG bio. Follow the steps below to add a location to an existing account.
Step 1: Launch Instagram.
Step 2: Go to your Business Account. Then Choose the Profile icon.
Step 3: Choose Edit Profile.

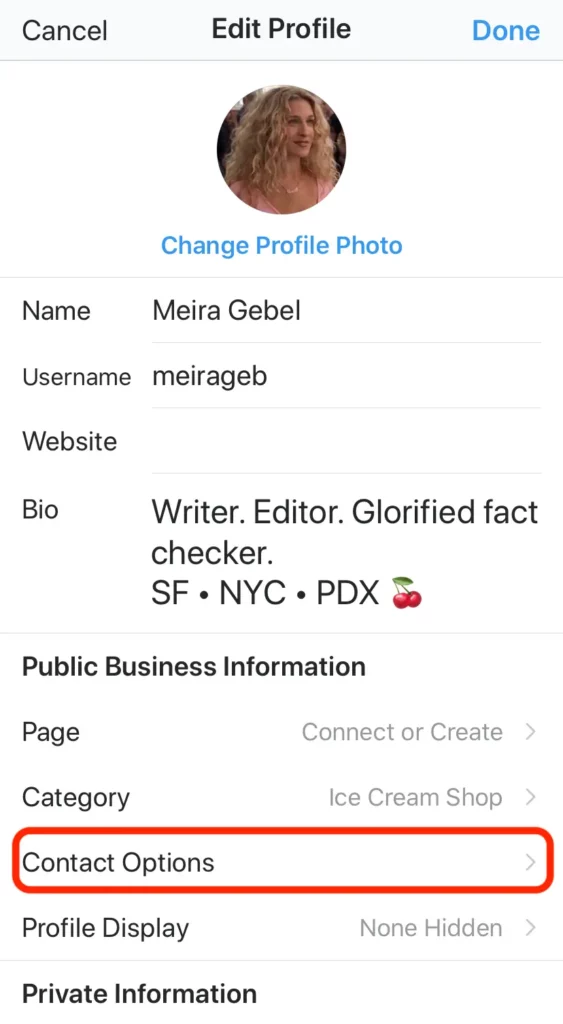
Step 4: Go to the Contact page.
Step 5: Choose the Business address.
Step 6: Provide your street address, city/town, and ZIP code.
Step 7: Tap the Tick icon in the Contact options section.
Step 8: Finally, on the Edit profile page, tap the Tick icon.
How To Add Location On Instagram Bio As A Google Map Link?
Launch Google Maps > Enter your business address > Press Search > Select the option to Share > Choose Copy to clipboard > Visit Instagram > Create a Business Account > Choose the Profile icon > Choose Edit Profile > Hit the Add Link button > Choose the Add external connection > Copy and paste the Google location URL > Remove everything preceding https:// > Choose the Tick icon > Choose the Left arrow icon > Tap the Tick icon in the Edit profile section.
A business account is not required to add a Google Map link. The link can be easily added to your regular Instagram account. In addition, you can include a direct Google Maps location link in your Instagram bio. When your consumers click the link, they will be redirected to Google Maps, where they will be able to see a more exact location of your business.
Step 1: Launch Google Maps.
Step 2: Enter your business address in the search bar and press Search.
Step 3: Scroll to the right and select the option to Share.
Step 4: Choose Copy to clipboard.
Step 5: Visit Instagram.
Step 6: Create a Business Account.
Step 7: Choose the Profile icon.
Step 8: Choose Edit Profile.
Step 9: Hit the Add Link button.
Step 10: Choose the Add external connection option.
Step 11: Copy and paste the Google location URL.
Step 12: Remove everything preceding https://.
Step 13: Choose the Tick icon and choose the left arrow icon.
Step 14: Tap the Tick icon in the Edit profile section.
Wrapping Up
And that’s a wrap! Whenever we are about to travel to a specific area, the first thing that we see is the map or the location as it gives us a sense of clarity. Same way, adding the location in IG bio attracts customers in an indirect way. By now, you must have gained a clear understanding on how to add location on Instagram bio. What are you waiting for?! Go ahead and add location on your Instagram bio. Visit us at Deasilex to know more about such informative articles.
Frequently Asked Questions
Q1. Why Can’t I Add Location On Instagram?
Ans. If locations do not appear when you submit a photo and add a location, make sure you have Instagram’s location switched on in your phone’s settings.
Q2. Why Do People Put Their Location In Instagram Bio?
Ans. Adding Instagram Locations to your or your clients’ posts is comparable to including hashtags in the captions of your Instagram pictures. Including a location makes it easier for you to reach out to potential customers and for consumers to discover you.
Q3. What Is The Perfect Bio?
Ans. Your bio should highlight significant professional positions and accomplishments. It is also beneficial to include your passions, personal interests, and how you bring your ideas to your work. Finally, your bio should allow readers to get to know you. As a result, it should reflect your individuality.
Q4. Why Is It Called Instagram Feed?
Ans. The term “Instagram Feed” refers to your primary Instagram profile page and the photographs and videos you upload to it. These photographs and videos may appear in the feeds of your followers as well as people who follow any of the hashtags you used in your post
Q5. Is Instagram A Feed Or A Timeline?
Ans. Instagram chose to delete the chronological feed, which displayed posts in the order in which they were published, in 2016. It switched to an algorithm-based feed that displays posts it believes you will be interested in.