

Google Chrome is undoubtedly the best and most used Web browser of all time. The browsing platform offers its user several options that make browsing easier. One such feature is the ease of deleting the google chrome browsing history on any platform.
One of the major reasons for the reliability of the web application is its security provided by Google. All you have to do is log in with your Gmail account on the platform and the browser will help you in saving and remembering the passwords. But, this remembering power of the Chrome application can sometimes be embarrassing. Yeah, you guessed that right we are talking about the browsing history. So, here are the easy steps that will let you delete the browsing history on google chrome.
Well, Google also provides you with two ways to delete its history. One is via manual means and the other is via automatic means. So, let us have a look at all of them one by one.
How To Clear Your History in Google Chrome From Desktop
- Open the Google Chrome Browser on your laptop.
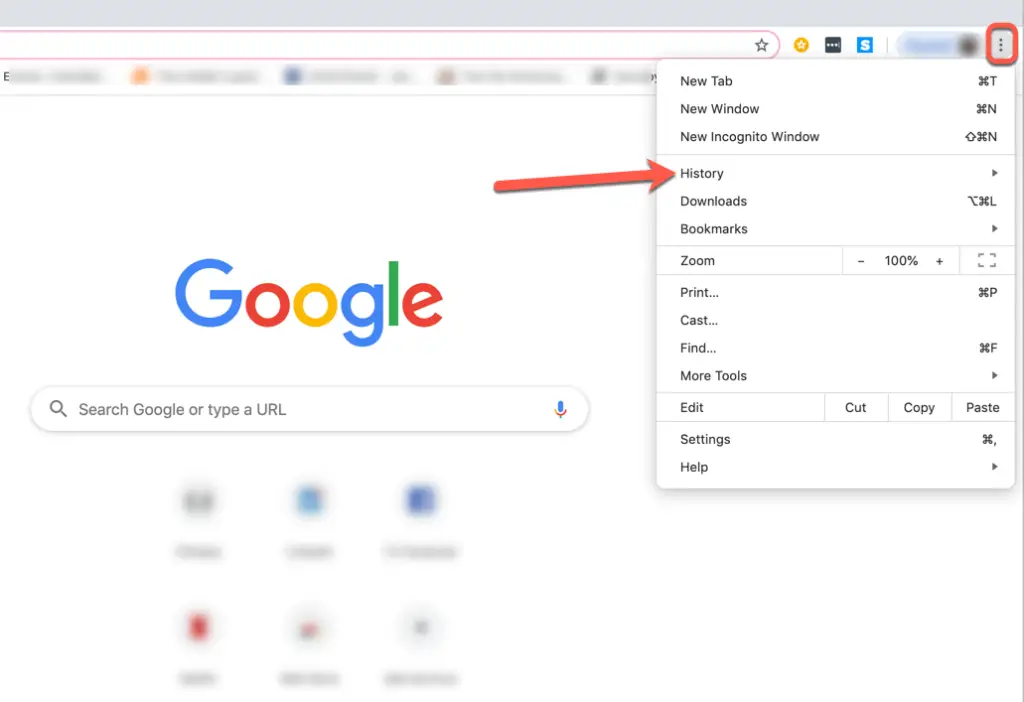
- Now, navigate to the three buttons present on the top right corner of the screen.
- Click on these dots and a list will appear in front of you.
- Now, from the list of menus that appeared in front, click on “History”.
- This open the history window in front of you (Carrying you your darkest secrets)
- Well, you can also reach this window by just pressing “Ctrl + H” on your keyboard.
- On the left window pane, you will find the option saying “Clear Browsing Data” and click on it.
- A window will appear in front of you, you can select the time range from here. For example, if you select “One Hour”, the chrome will erase the history from the last hour.
- Next, click on “Clear Data”, this will clear the browsing history from Google Chrome on your desktop.
Also Read, How To Clear Browsing Data And Cookies In Microsoft Edge
How To Delete The Search History From Google Account Manually
You can use this step to delete the history from all of the applications that require your Gmail account to log in. You don’t necessarily have to go to every application to delete its history. Follow the steps given below to do so.
- Go to the website https://myaccount.google.com/ and login to your account if you haven’t yet.
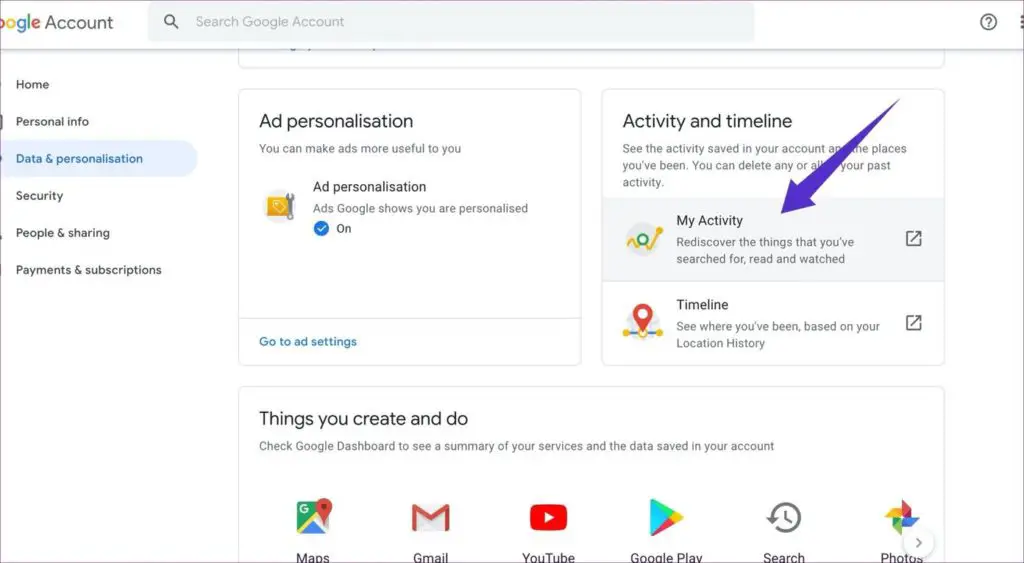
- On the right window pane, you will find the option “Data & Personalization”. Click on it.
- On the right window pane navigate to the tab “Activity and Timeline”. Under the tab look for the option “My Activity” and click on it.
- On the new window, screen click on the three dots on the top right corner. This will open a list of options.
- From the options click on “Delete Activity By”
- Or you can also search for the “My Activity” on the homepage to reach this step.
- Click on “All Time” and select the application from which you want to delete the history.
- Click “Next” and then in the confirmation box select “OK”.
How To Delete The Search History From Google Account Automatically
To delete the history automatically in the google account you can follow the following steps of the procedure.
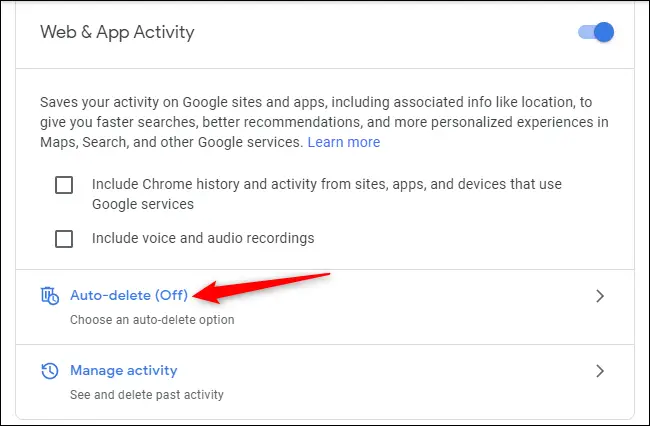
- Go to the website https://myactivity.google.com/activitycontrols/webandapp.
- Next, navigate to the option that says “Auto-Delete” and click on it.
- This will provide you the option to select the time after which you want your search history to get clear.
- Then click “Next” and then select “Confirm” to save the changes.
Also Read, How To Clear History In Mozilla Firefox
Wrapping Up
You can also go incognito on the Google Chrome application. To go to the private browsing on Google Chrome on desktop, you can use the combination of Keys “Ctrl + N”. Well, this won’t save your search history but it has a drawback. The websites that require login won’t work in this mode.