
Google Docs do let us make all kinds of adjustments to our texts. With the help of Google Docs, you can even modify the look of your documents just to ensure that you make them look the best on your screen and also on paper. But of late there are many users who want to know how to fix margins on Google Docs. Do you also want to know about it? If yes, then you have come to the right place.
In Google Docs we do have a l’il bit of control when it comes to how the text will appear on the printed page and on the screen. The margin is the empty space that is in between the documents contents along with the edges of the page. The default margin of the doc is 1 inch on each side of the page. But don’t worry, you can fix margins according to your needs.
So, if you too like others want to know how to fix margins on Google Docs, then don’t worry, the steps are really easy to follow. Once you fix the changes you can easily make the document appealing and in the way you want it to be. Here’s how you can do it: file > page setup > margins > ok. And that’s it
Don’t worry, we have mentioned all the steps that will help you to fix the margins on Google Docs easily. So, without wasting any more time let’s quickly get started.
What Are Margins Used For In Google Docs?
Well, the margins often refer to the blank spaces that surround the Google Docs file. The margins do not have any images or text and the main purpose is to avoid the text from colliding with the edges of your documents. Due to this, the aesthetics of your document is improved where the margins prevent the text from extending too far and make your document more difficult to read.
When you insert the binding for all kinds of printed documents it may need you to adjust the margins to the specific sizes to avoid the binding from interfering with the text.
Related: How To Rotate Text In Google Docs: Proven Ways To Try Out In 2022
How To Fix Margins On Google Docs On Your Computer?
Well, you can say that fixing the margins in Google Docs on the computer is the easiest way by which you can make the adjustments. When you view the document on the large screen you will see that handling some of the features is actually very simple.
How To Fix Margins On Google Docs With The Ruler?
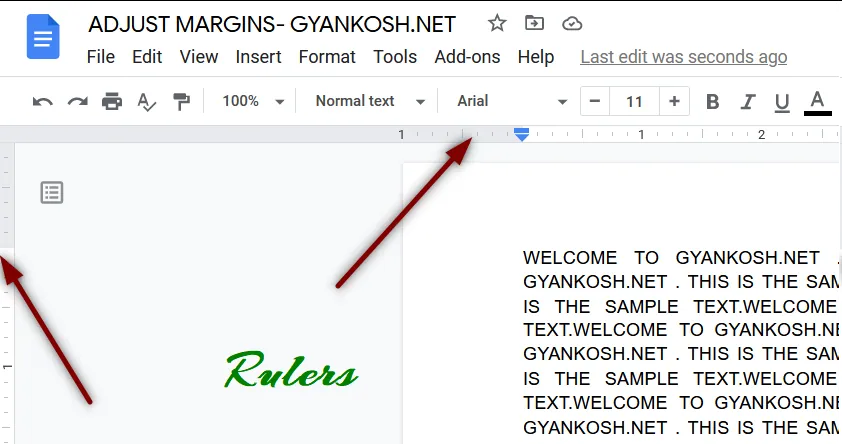
If you want to know how to fix margins on Google Docs with a ruler then here are a few steps that you need to follow:
- If you are not able to see the ruler on your desktop just turn on the feature by clicking on the view option followed by the show ruler option.
- Now, start with the left margin of your file. Place the cursor anywhere over the grey zone of the program which you will find at the top of your screen on the left section of the ruler. In this way, you will get to see the ruler pointer will turn into an arrow.
- Start to click and drag the grey zone to the right portion of the desktop, so that you can increase the margin. Then, move the pointer to the left so that you get the small margin.
- You can even do this with the other margins. Simply drag the pointer in the grey zone as per your preference.
- At the end of the margin, you will get to see the triangle that will point downward along with a blue rectangle.
- These icons represent the left indent along with the first line indent.
- By default, there will not be any indents in your document. But you can still change this by simply dragging the first line indent towards the right of the document by half an inch.
Related: How To Use Word Art In Google Docs | Spice Up Your Doc With Word Art!
How To Fix Margins On Google Docs With The Page Setup Option?
The page setup option is perhaps the alternative to navigating the ruler. This feature will enable you to enter precise measurements for your documents. Here are a few steps that you need to follow.
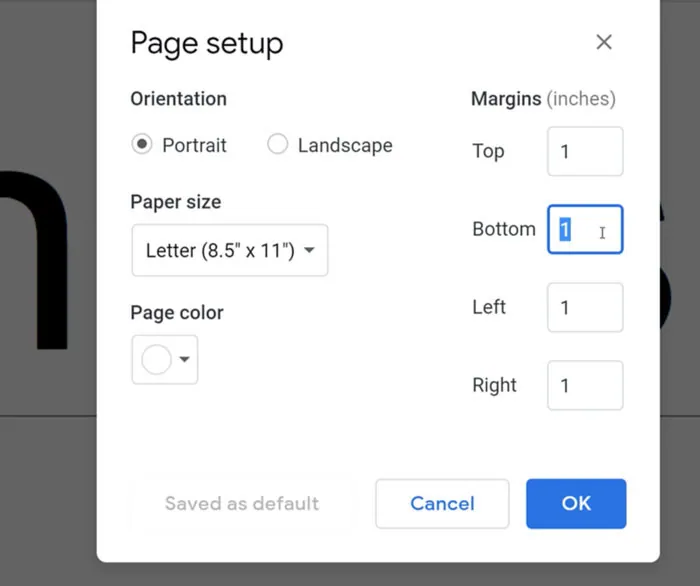
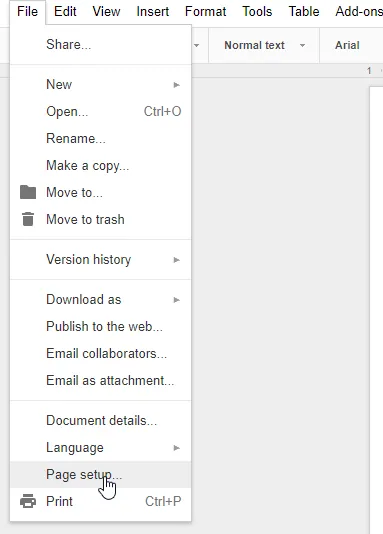
- When your document is open go to the file option and then hit the page setup option.
- Now, type in the measurement for the top, right left, and bottom margins in the box that is situated under the margins section.
- Click on the ok option to apply the changes.
Related: How To Make A Double Line Graph In Google Sheets And Google Docs?
How To Fix Margins On Google Docs On iOS?
Google Docs is also very user-friendly on iPhone. Here are a few steps that you need to follow.
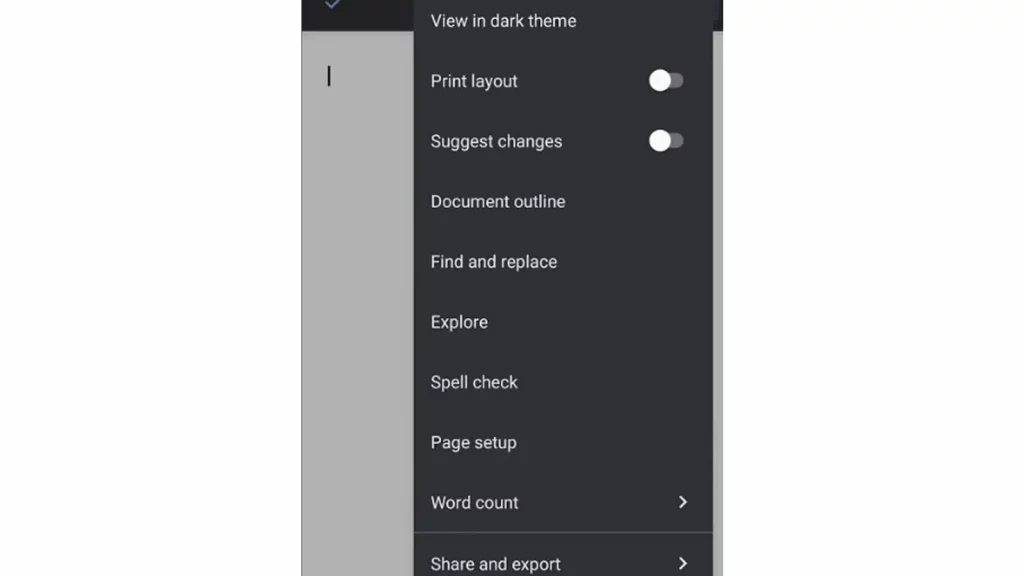
- Open the Google Docs file and then go to the menu.
- Next, you have to go to the page setup section and then click on the margins option.
- Select whether you want the custom, default, narrow, or wide margins setup for your document.
- The wide margin setup will be applied two inches for right and left margins along with one-inch top and bottom margins.
- If you use the default margins then it means that all four margins will be met to one inch.
- Lastly, the narrow-inch setup will create a half-inch margin for all four sides.
Related: How To Move Images In Google Docs? 4 Best Ways!!
How To Fix Margins On Google Docs On An Android Device?
Well, if you want to know how to fix margins on Google Docs, then sadly Android does not allow its users to fix the margins in Google Docs. But don’t worry, you can make other changes to your Google Docs file on your Android device so that you can adjust the look of your documents. Like you can modify the page color, orientation, or size of the doc using your android phone. Here are a few steps that will help you.
- First, open the previous google doc or create a new doc with the new button.
- Go to the edit section that has the pen icon in the right portion of the display.
- Choose the page setup option.
- Then choose the setting that you want to adjust. So, if you want to set the orientation to landscape or portrait then change the paper size and use a different color for the documents.
- Make the changes according to your preference.
Related: How to Draw on Google Docs | Simple Google Hacks
Wrapping Up:
Now, after reading this post you do know how to fix margins on Google Docs. The steps that we have mentioned are really easy to follow. With the help of these steps, you can easily fix the margins in your Google Docs.
Frequently Asked Questions
Q. How To Change The Size Of Google Slides?
To change the size of google slides follow these steps:
- Open the presentation in google slides
- Click on the file option followed by page setup.
- Pickup the size from the given option and then hit the down arrow,
- Tap ok.
Q. How To Change List Type On Your Google Docs?
To change the list type on your Google Docs, here’s what you need to do:
- Open the presentation or document in Google Docs or slides.
- Tap on the number, checkbox, or bullet in Google Docs.
- Click on the format and then on bullets and numbering.
- Choose the bullet type and you are done.