
Playing with Instagram Reels could go wrong if you are unaware of Instagram Reels Audio Mixing and Volume Control.A good engaging video should come with original audio or trending music. Mixing trending music with original audio is even better. But, do you know how to make the balance?
People on Instagram are working hard to create amazing Reels as Instagram pays for Reels. If we assume you are one of them, then let us share this great tip with you. The reason why Instagram Reels’s Audio Mixing and Volume Control are important is – Instagram encourages Reels with original audio as well as mixing trending music.
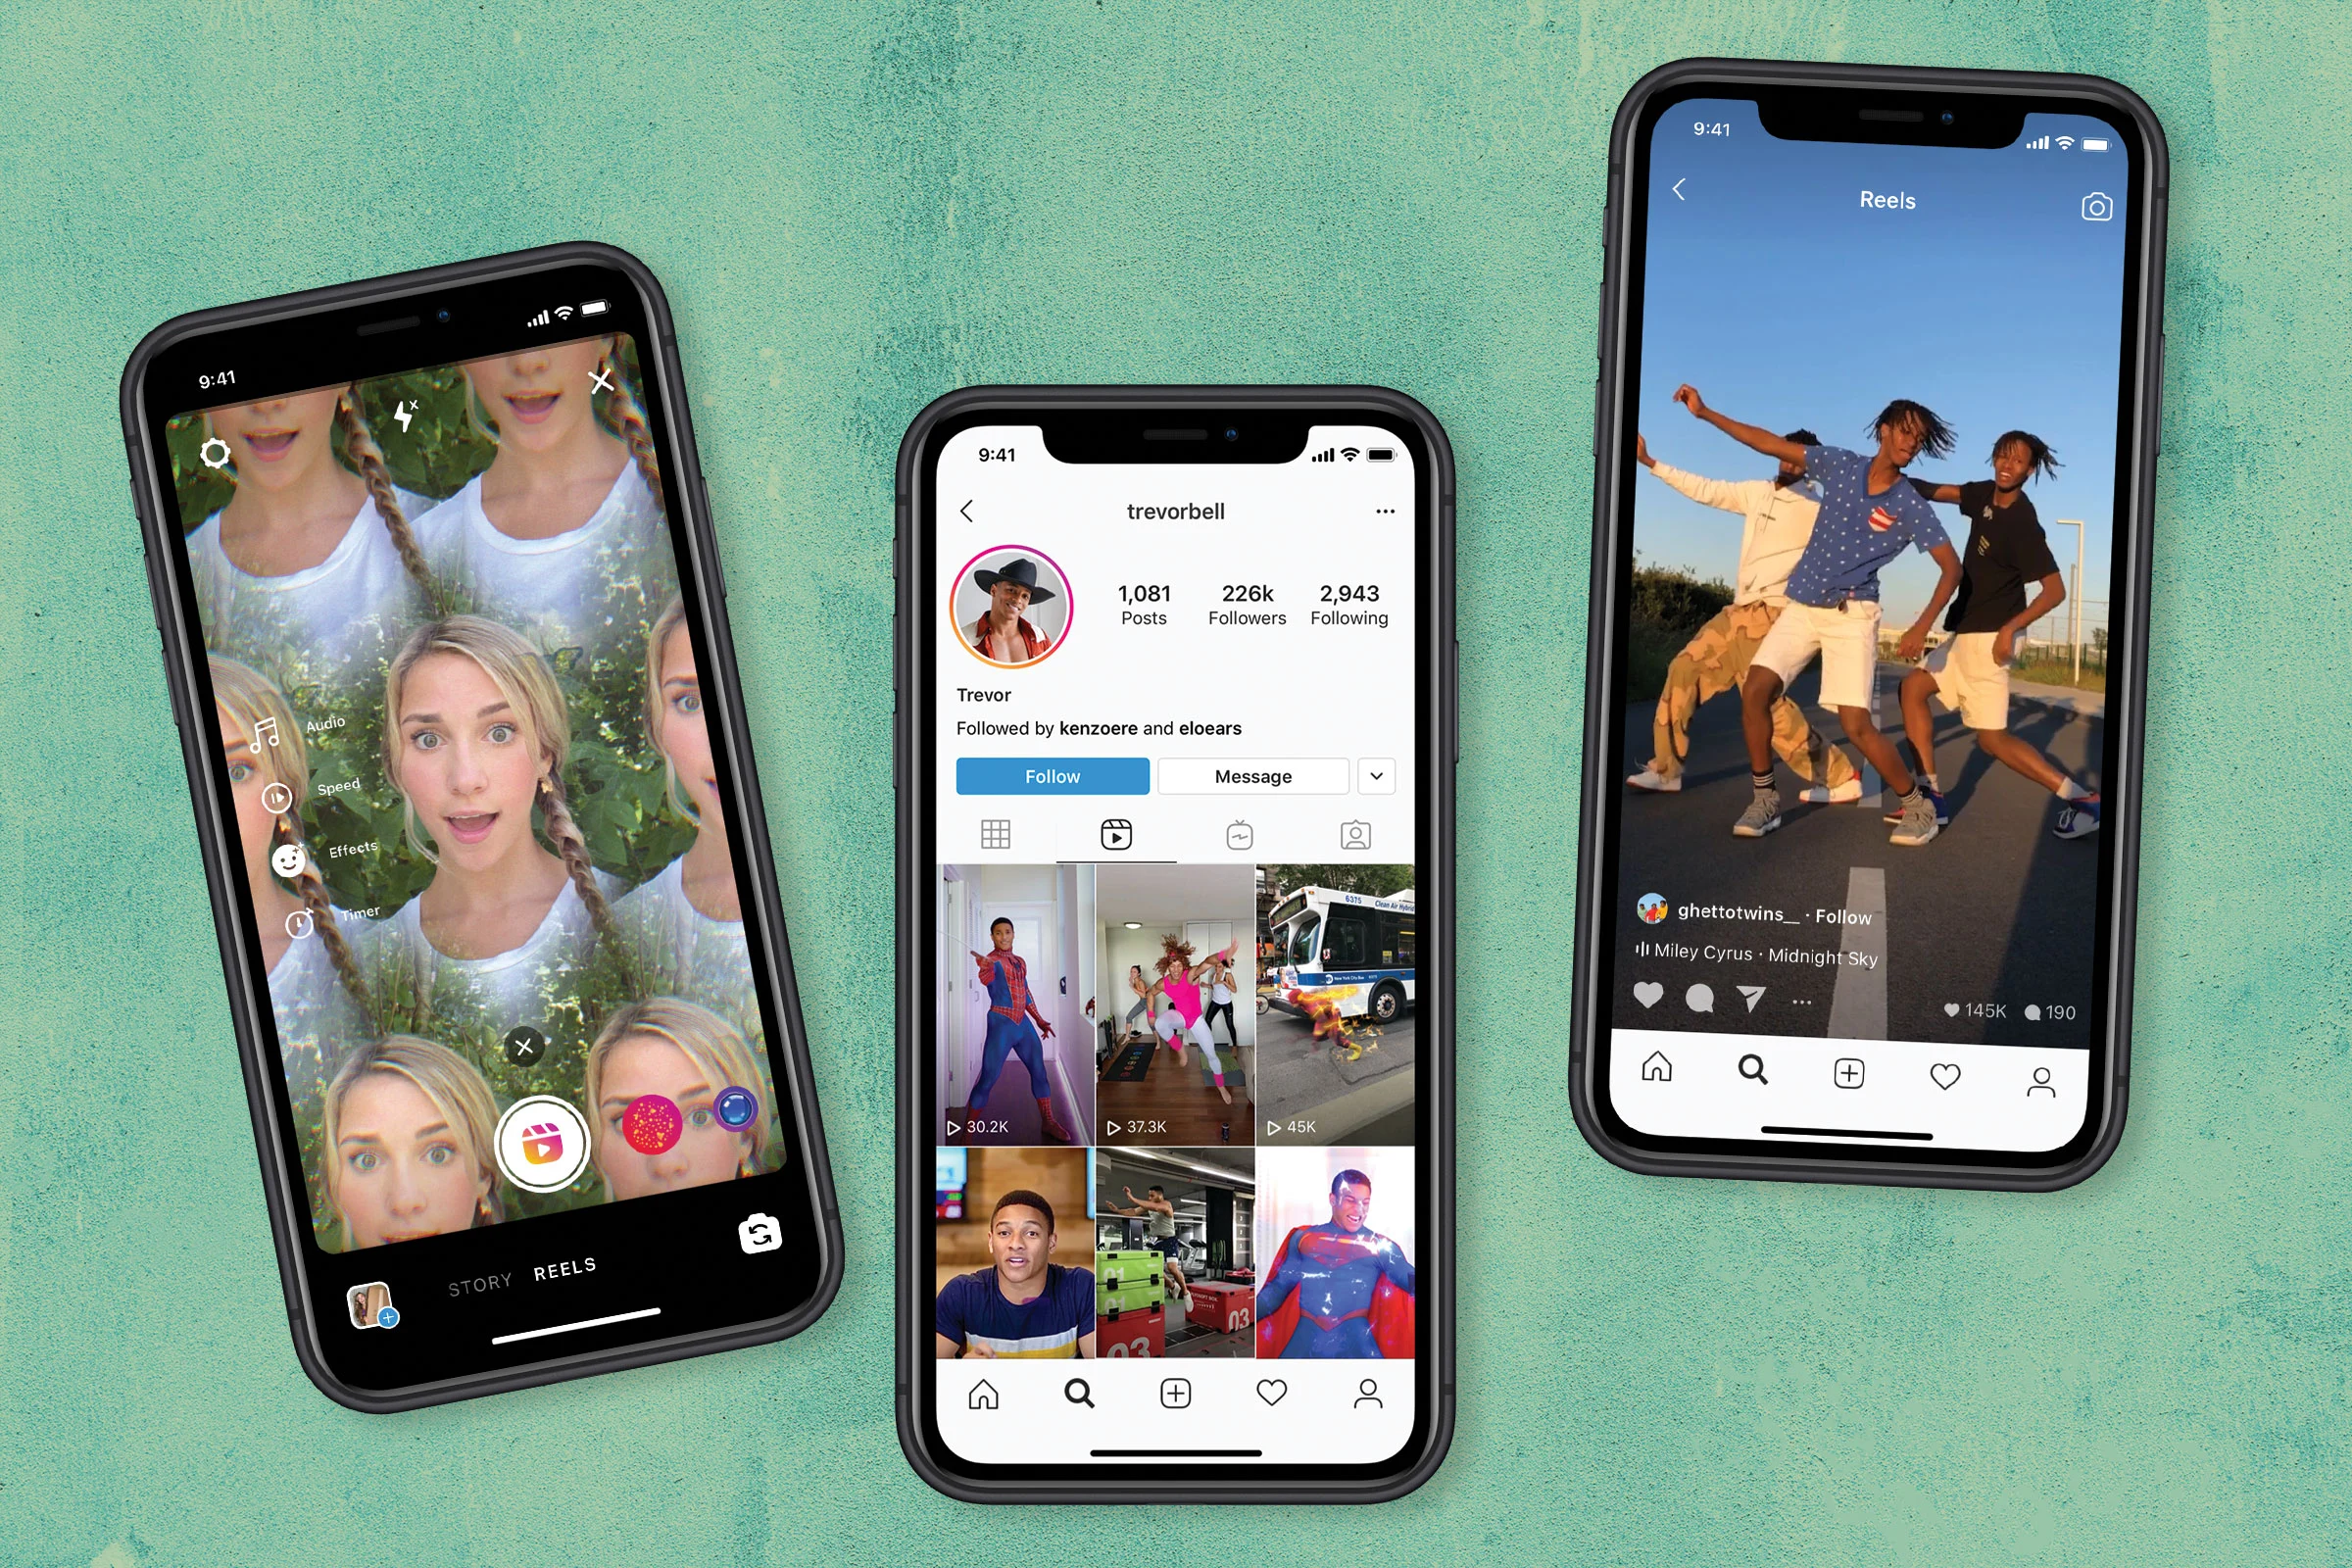
To learn how Instagram Reels Audio Mixing and Volume Control works, Create a Reel and go to the preview option. From there, you can explore audio mixing by clicking on the “Music” option.
Not just Instagram influencers, even the megastars on this platform are also creating Instagram Reels with mixed voiceovers. It is always welcome to add original audio, but when you think about sharing trending Instagram Reels audio with your original audio will kill the trend, just go for Instagram Reels Audio Mixing and Volume Control.
Audio Mixing Techniques For Instagram Reels
Audio mixing techniques sound cool to create amazing music. However, mastering the audio mixing techniques is not as easy as it sounds! Hence, Instagram Reels Audio Mixing and Volume Control is an important feature that is introduced by Instagram. It is considered, Audio mixing tool is helpful to create outstanding audio that can make Reels go viral!
Importance Of Audio Mixing
There are subtle differences between audio recorded in general and the audio added with the Instagram Reels. Auditing and mixing songs and music is an important job and takes time to master.
Creating Reels takes time and strategy that includes both content creation and videography. Editing video and synchronizing it with audio takes great effort too. Many professional Instagram Reel creators assemble a team to handle Instagram Reels Audio Mixing and Volume Control. Reels that do not sync well with the audio hardly get any views or likes on Instagram.
Choosing Audio For Instagram Reels
Choosing Audio for Instagram Reels is not a difficult job, but an important one! Technically, it’s a two-step process; first, record a Reel on Instagram, and second add audio to the Reel by tapping the music icon. Simple! Or is it?
However, we warn you, finding ideal audio requires skills and creativity, especially if you are mixing the audio. We have found four possible ways to add your desired audion to the Instagram Reel:
Instagram Audio Library: Instagram has a built-in audio library that includes popular sound clips and songs. Browse the library and choose the ideal one for your Reel. You can also use the search bar to find popular soundtracks.
Upload Original Audio: If you think your desired music or sound is not available in the Instagram library, just upload it! You can create your own music and upload it to Instagram Reel and see the clip going viral!
Choose Audio With Positive Vibes: If you are promoting a product on Instagram, make sure that you are selecting audio that not only trending but also carries a positive vibe. It helps to channel the positive vibe to the viewers and make them engage.
Using Grooves Feature: Instagram Grooves feature is the newest addition to make more creative reels with minimum editing. Just click on the Groove icon before selecting the video and the feature will automatically adjust the video with the music you select. The best part of this feature is that it automatically suggests you the audio that fits the reel! You can also choose the video style – bounce and smooth.
Basic Audio Mixing Techniques
Musicians and song editors use endless numbers of techniques to mix the audio including EQ (Equalizer), compression, reverb, delay, saturation, and so on! However, when it comes to Instagram Reels Audio Mixing and Volume Control, the process is a much “light version”, yet requires skills.
The basic audio mixing technique for Instagram follows simple steps:
Step 1: Record Your Reel and go to the preview option.
Step 2: To add audio, tap on the music icon.
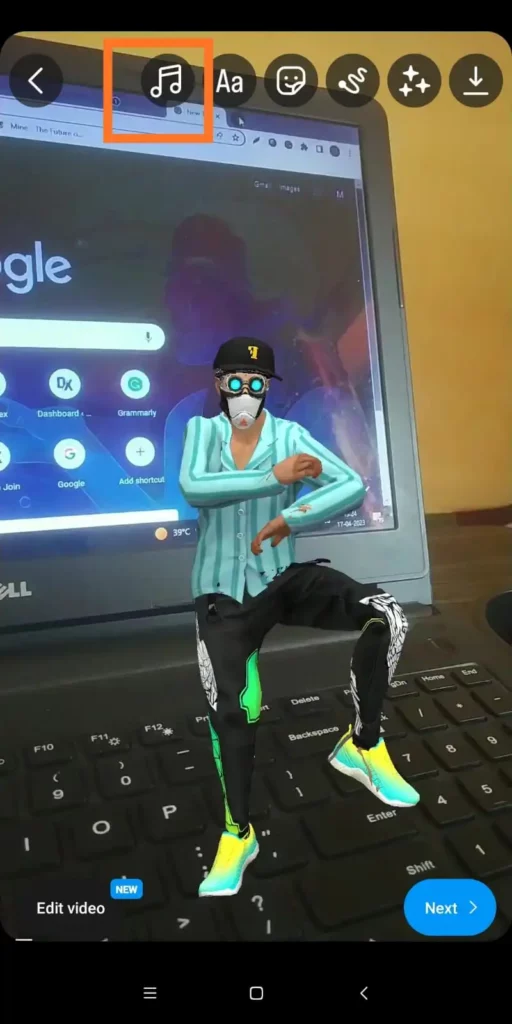
Step 3: From there you can choose Music, voiceover or sound effects.

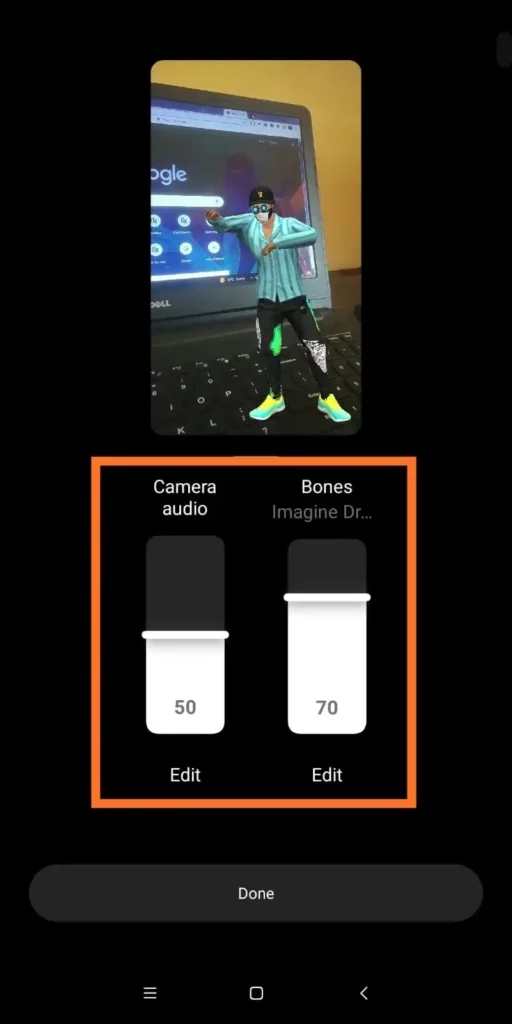
Step 4: To adjust the volume for each audio, tap and drag the bar. You Can edit or remove video anytime you want.
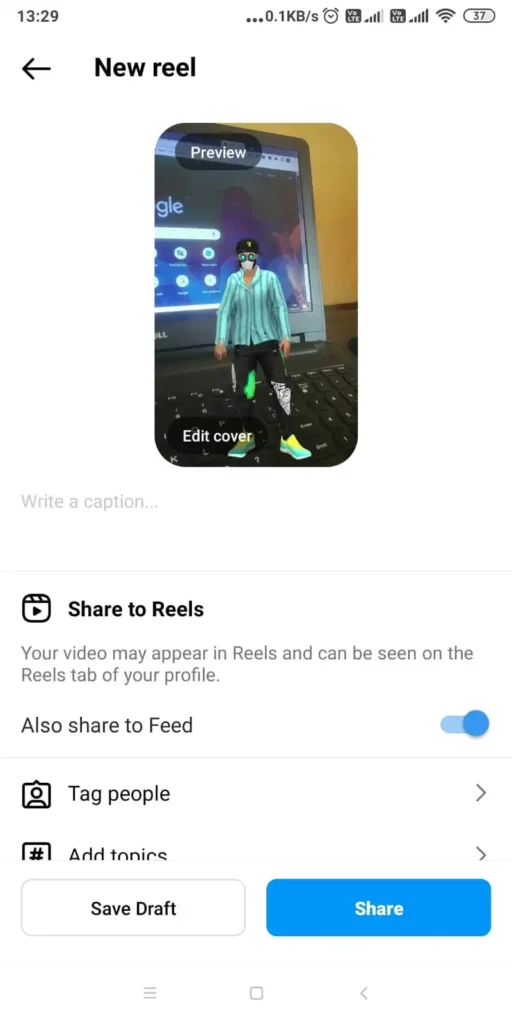
Step 5: Tap Done and Next to share your Reel with the audio mix.
Using EQ To Adjust Frequencies
If you are working with audio for your Instagram Reels and have a feeling to alter the frequency bands, then EQ would be your ideal choice. EQ stands for Equalizer which helps you to pick the EQ points that are close to a particular frequency (that you wish to alter) and simply move it up or down to boost or reduce the frequency.
Professional music editors often use this technique to correct the music. As a professional Instagram Reel contributor, you can create your own music and adjust the frequencies with EQ and upload it with awesome Reels. After uploading the music with Reel, you will get a chance to again try the Instagram Reels Audio Mixing tool.
Using Compression To Balance Audio Levels
While recording music you will get some louder notes and some are quieter. But, you need a sound as smooth as a cream! How to get it? The easiest way is to use compression. With a compression tool, you can make the loud notes smooth and make the recording better.
Unfortunately, Instagram Reels Audio Mixing and Volume Control does not offer a compression feature. For better Instagram original audio, we only refer you to record the audio separately and use the compression tool to make the procedure smooth and then upload the audio with the Instagram Reel. The differences will be reflected in the Reels views.
Volume Control In Instagram Reels
Volume control in Instagram Reels is another important feature to talk about! You can control the audio and music volumes after adding them to the Reel. You simply need to slide up and down the button under the music to adjust the volume level.
1. Importance Of Volume Control
Audio plays a significant role to make Instagram Reels viral! And, you need to control the volume level of the audio throughout the video, especially if you are mixing audio. If you are looking forward to making your Reel perform better, try to add catchy audio along with the original audio and mix it using Instagram Reels Audio Mixing and Volume Control tool.
Compressing and editing the volume of the Reels will make the Instagram Reel smooth to hear and will of course be more appealing to the users.
2. Adjusting Volume For Spoken Audio
You can prepare your original audio and then upload it with the Instagram realtor choose any trending music from the Instagram library. Before sharing the Reel you will find an option to control the audio volume. You can add voiceover to Reel or original audio to score better on Instagram. You can also try text to speech feature on Instagram Reels. By doing that you can not only adjust the volume for spoken audio but also remove unwanted noises from the Reel.
3. Adjusting Volume For Music
Adjusting the volume for music on Instagram Reels is also super easy. As mentioned earlier, you can add the music after recording the Reel with the help of Instagram Reels Audio Mixing and Volume Control option and try Instagram multi-clip editing to make it fit.
As soon as you have completed recording the Instagram Reel, add music that goes with the Reel best. You will have the option to mix audio and adjust the volume for multiple music that you have used in the Reel.
How To Create High-Quality Audio In Instagram Reels?
Creating high-quality audio is not a difficult job, but important to make your Reels perform highly. Professional music editors follow more than 10 steps to create high-quality audio. However, if you have a small backup team or it’s only you working hard to create a high-performance Reel then you can simply follow three editorial rules – having good recording equipment, choosing the right background noise, and removing the unwanted noise.
1. Importance Of Good Recording Equipment
You already know that a better camera and a better microphone are the must-have things to create amazing Reels that can stand out in the Instagram popularity challenge. Let’s consider your personality and voice quality while choosing the right mic for you. Most podcast influencers go for a regular microphone. However, for Instagram Reels, we always suggest choosing better brands as you need to edit and use the audio with your Reel.
2. Choosing The Right Background Noise
You should keep the background noises under control. Identify the right background noise and keep them to impress your followers. For example, if you are creating a Reel showing nature’s beauty, you might want to keep the cricket buzzing in the background.
3. Removing Unwanted Noise
Removing unwanted noises is a tedious yet important task. Otherwise, your video will lose interest. Always remove the unwanted noise from the background to keep your main audio-focused and clean so that the message could be delivered to the audience easily.
Troubleshooting Audio Issues In Instagram Reels
If you are experiencing troubleshooting audio issues In Instagram Reels then the Instagram Reels Audio Mixing and Volume Control option cannot rescue you from the problem. You need to check whether you have uploaded the audio correctly, the file might get corrupted, or there were any issues on the mic while recording the audio.
1. Common Audio Problems And Their Solutions
The common audio problems on Instagram Reels may include no sound or distorted sound, too much background noise, or a humming sound. The reason behind these types of issues may vary from broken mike to music editing tools that have been used for noise cancellation or compression. Hence, you have to cross-check all of the recording and editing equipment before starting to record the Instagram Reels audio.
2. Dealing With Low-Quality Audio
Dealing with low-quality audio is tough. We don’t recommend you use any low-quality audio in your Reel or your effort will be completely destroyed. We suggest using a high-quality audio recorder and accessories to record only good-quality audio and use the same in the Reel. However, if you are in a situation where you have to work with low-quality audio, try using third-party tools to clean the audio.
How To Optimize Audio For Instagram Reels?
Optimizing audio for Instagram Reels consists of multiple steps. But you can simply start with the Instagram Reels Audio Mixing and Volume Control option. Upload our audio clip with the Reels and then just go to the Audio mixing option and adjust the volume.
However, you can also optimize the audio quality before uploading it to Instagram by removing unwanted noises, compressing the tunes, and using EQ to make the audio smooth.
Conclusion
When most people consider creating competitive Reels to monetize the Reels, they only consider a few things like creating authentic content, the Reel has great picture quality, trending sound, trending hashtags, and Reels text and sticker features. What they are all missing here is the quality of the audio they are using in the Reel. An ideal Instagram Reel should have good audio quality throughout the Reel that delivers the message correctly to the viewers. Next time you are making an Instagram Reel consider mixing audio and we mean high-quality audio with your Reel to go viral!
Frequently Asked Questions
Q1. Can I Use Any Music I Want In My Instagram Reels?
Yes, you can. There is no bar to using music or songs in Instagram Reels. You can add original audio or add any music from the Instagram Video library. However, if you wish to borrow any original audio from another user’s post, you have to remix it!
Q2. Can You Use Two Audios On Instagram Reels?
Yes, you can use two audios using the Instagram Audio mixing tool. After recording your Reel on Instagram, go to the Mix Audio icon and adjust your audio as well as the original audio. Check the preview and post the Reel when it is ready.
Q3. Is It Better To Use Original Audio Or Music In Instagram Reels?
It is always the best practice to use the original audio or music in the Instagram Reels. You can find appropriate music in the Instagram Video library. Besides, Instagram encourages users to use original audio as much as possible; so that they become popular and other users can use your audio in remixes.
Q4. How Can I Make Sure That My Audio Levels Are Consistent Throughout My Reel?
To make sure that your audio levels are constant throughout the Reel, tap the Mix icon. Mix your audio and then use the slider to adjust the mix level and your audio levels will be consistent throughout the Reel.
Q5. What Is The Best Way To Remove Background Noise From My Reel’s Audio?
To remove the background noise from Reel’s audio, go to the preview. Drag the below bars of the audio to adjust the volume. Adjusting the volume of the mixed audio will help you to remove noises.